
Your Live Agent Panel
A First Look
What You See When You Log In
The moment you log in, ROUBOT takes you straight to the Live Chat screen — your primary workspace as a customer support agent. But before diving into conversations, it's worth taking a moment to understand the full layout of what's in front of you.
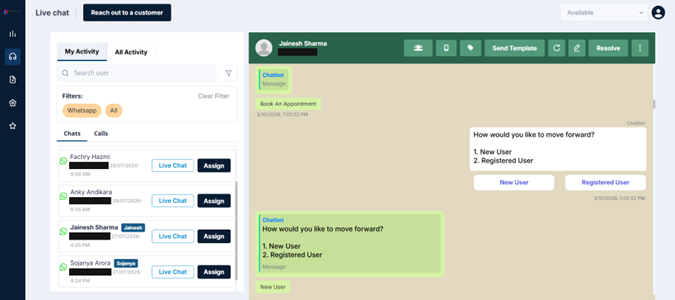
Think of this screen as your control centre. Everything you need — your conversations, your performance stats, your settings, your customer outreach tools — is accessible from this single interface. Nothing is buried deep. Once you know where things live, navigating the Live agent panel becomes easy.
The interface is made up of three key zones:
your main menu to move between different modules
where you manage your profile, availability status, and initiate outreach
the working area that changes based on which module you're in
Let's walk through each one.
The Left Navigation Panel
On the far left of your screen, you'll see a slim vertical panel with five icons stacked one below the other. This is your main navigation menu — it's always visible no matter which part of the platform you're in.
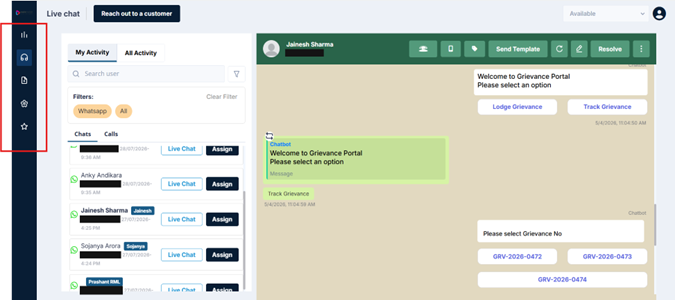
Hover over any icon to see its name. Here's what each one does:
1. Dashboard
Your personal performance hub. The Dashboard gives you a real-time and date-filtered view of your activity as an agent — things like how many conversations you've handled, how many were resolved, messages sent across different channels, and more.
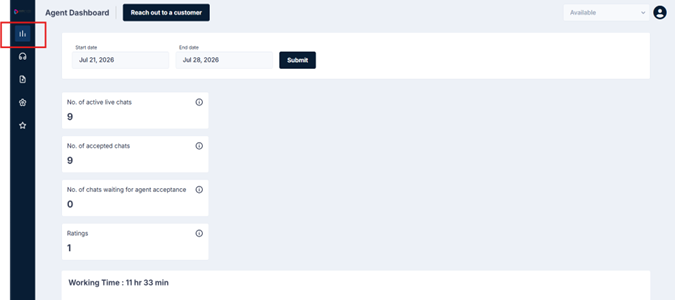
It's the place to go when you want a quick pulse check on your own numbers. We'll cover the Dashboard in detail in its own section.
2. Live Chat
This is where your day-to-day work happens. The Live Chat module is your conversation workspace — incoming customer chats land here, you respond here, and you manage the full lifecycle of each conversation from this screen.
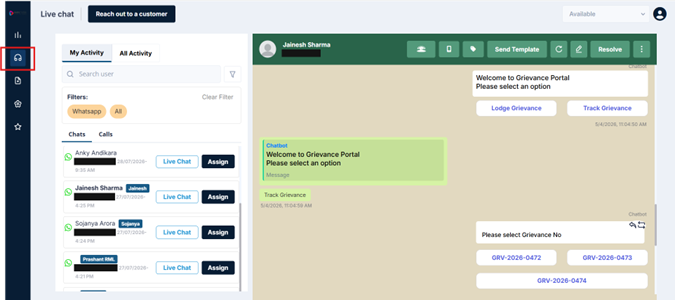
When you log in, you're automatically brought to this screen. You'll spend most of your time here.
3. Quick Send
Quick Send is your personal template library — a collection of pre-written messages that you can instantly use during customer conversations instead of typing responses from scratch every time. It's designed to save you time and keep your communication consistent. More on this when we deep dive into the module.
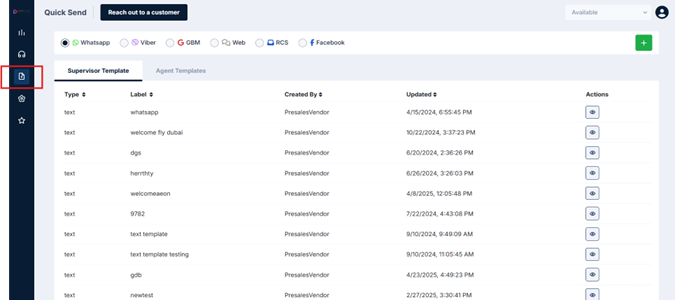
4. Configuration
This section gives you access to settings relevant to your agent profile and workspace. Think of it as your personalization and setup area.
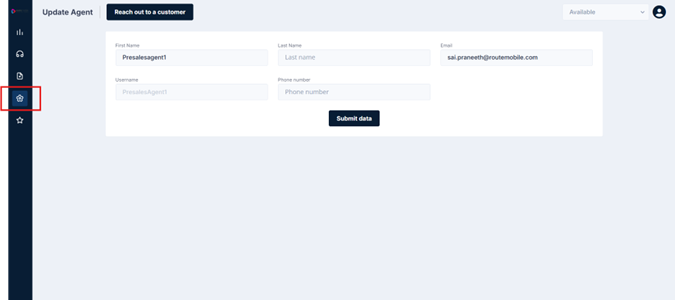
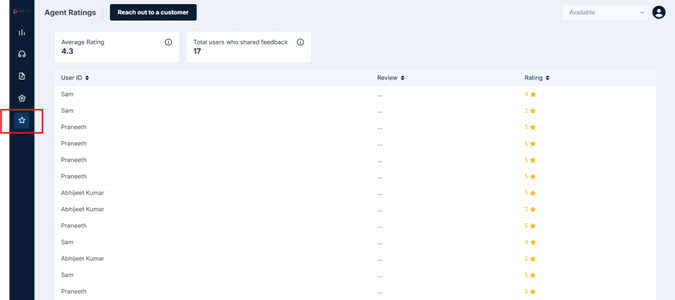
5. Ratings & Reviews
This module gives you visibility into customer feedback and satisfaction scores tied to your conversations. A useful space to understand how customers are experiencing their interactions with you.
Good to know: Each of these five icons has its own dedicated chapter in this guide. The overview above is just to help you get oriented. As you read on, we'll go into each one in full detail — what it does, what you'll find inside, and how to use it.
At the Top of Your screen
Across the top of your screen, you'll notice a few elements that stay consistent no matter which module you're in.
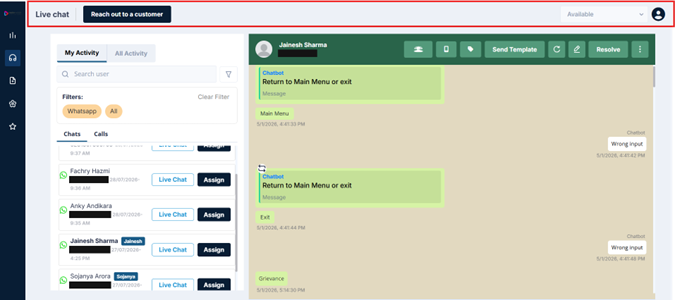
Your Profile (Top Right)
In the top-right corner, you'll see a circular profile icon. Clicking on it opens a small dropdown with two options:
| Option | Description |
|---|---|
| Change Password | Update your login password directly from here |
| Sign Out | Log out of your ROUBOT session securely |
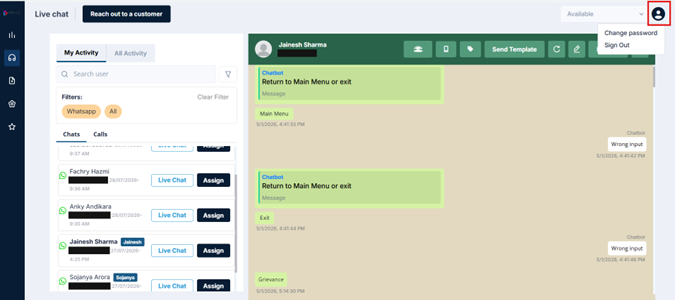
Always use Sign Out when you're done for the day or stepping away from a shared device. Simply closing the browser tab does not end your session.
Your Availability Status
Right next to your profile icon, you'll see your current status — by default, this is set to Available.
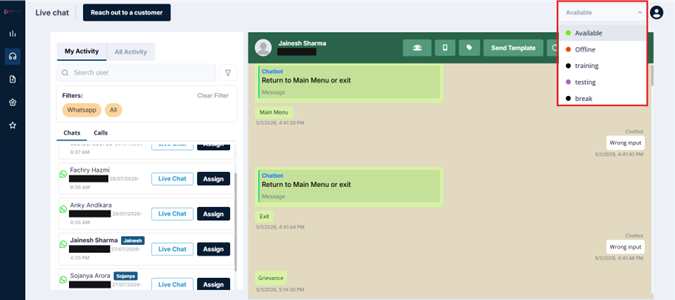
Clicking on it opens a dropdown to switch your status. At a minimum, you'll have:
| Status | Description |
|---|---|
| Available | You're active and ready to receive incoming conversations |
| Offline | You're not available to receive chats |
Depending on your organization's setup, your administrator may have added custom statuses such as Break, Training, In a Meeting, and so on.
💡 Make it a habit to update your status whenever your availability changes. This directly affects whether new conversations are routed to you.
Page Title & 'Reach Out to a Customer'
On the top-left, you'll always see the name of the module you're currently in — this updates as you navigate, so you always know where you are.
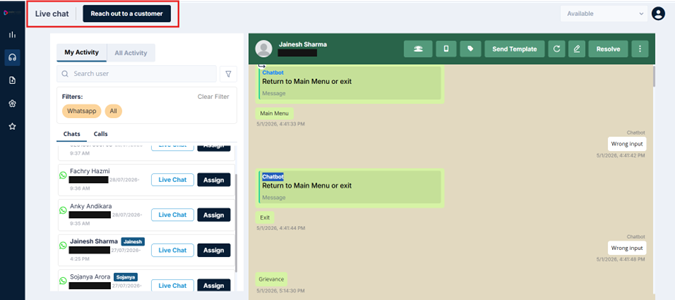
Right next to it is the 'Reach Out to a Customer' button — which lets you proactively initiate a conversation with a customer. We'll cover this in detail in its own section.
Don't see this button? This feature is not enabled by default — it's available for enterprises that have specifically requested it. If it's not visible on your screen, reach out to your administrator or supervisor. They can contact the ROUBOT support team to get it enabled for your organization.
How This Guide Is Organized From Here
Now that you have a clear picture of the overall layout, the rest of this guide follows the same structure as the navigation panel — moving through each module one by one.
We'll start with the module you land on first: Live Chat.
Updated 3 months ago