
Additional Functions
Use additional functions in SmsPlus SGN Client to block numbers, filter DND numbers, and manage report-panel users.
Overview
Additional functions help you manage message delivery and reporting access. You can use these functions to:
- Block phone numbers from receiving messages.
- Filter do-not-disturb (DND) numbers before sending messages.
- Create customised report views for sub-users.
Block Numbers
Use Black List to upload phone numbers that should not receive messages.
You can upload a text file or comma-separated values file containing line-separated phone numbers. When the system encounters these numbers while sending messages through any messaging mode, it blocks messages to them.
The system blocks the uploaded numbers for one day.
Open Black List
From the Utilities menu, click Black List.
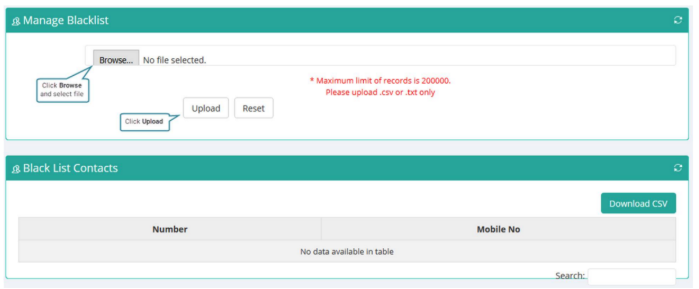
Block Numbers
To block numbers
- Click Browse. The File Upload dialog box appears.
- Browse and select the required file.
- Click Open.
- If you receive a message stating that you have valid numbers, click OK.
- Click Upload.
- Verify that the numbers in your file appear in the Black List Contacts section under Mobile No.
Your file can contain up to 200,000 line-separated numbers.
Filter DND Numbers
Use DND Scrubbing to increase message submission rates by filtering out DND numbers before sending messages.
Before you submit messages through a messaging mode, upload your file containing phone numbers on the DND Scrubbing page. The system automatically tracks DND numbers in the file. When you later upload this file while sending messages, DND numbers do not receive messages.
Open DND Scrubbing
From the Utilities menu, click DND Scrubbing.
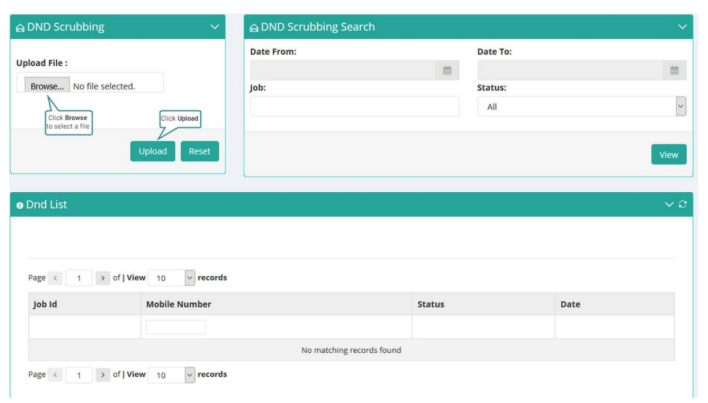
DND Filtering
To filter DND numbers
- Click Browse.
- Select the required file with phone numbers.
- Click Upload.
- Proceed to send messages through any messaging mode.
- View the job ID on the Job Management page.
- On the DND Scrubbing page, type the job ID in the Job box under DND Scrubbing Search.
- Select the Date From and Date To dates.
- Click View.
- Review the phone numbers in the DND List section.
- Use the Status list to view numbers by status:
- DND
- Non-DND
- Numbers the system is still processing
Manage Users
Use Report Panel User Mgmt to create report-panel users with limited visibility of reports for different user accounts.
As a customer, you may have multiple user accounts. You can allow other users in your organisation to view specific account reports through a single-pane-of-glass view.
A report-panel user can be configured by:
- Creating the report-panel user.
- Assigning report visibility rights.
- Assigning the report-panel user to a user account.
For more information about reports, see Chapter 9, Reports.
Open Report Panel User Management
Click Report Panel User Mgmt on the menu bar to display the Add User page.
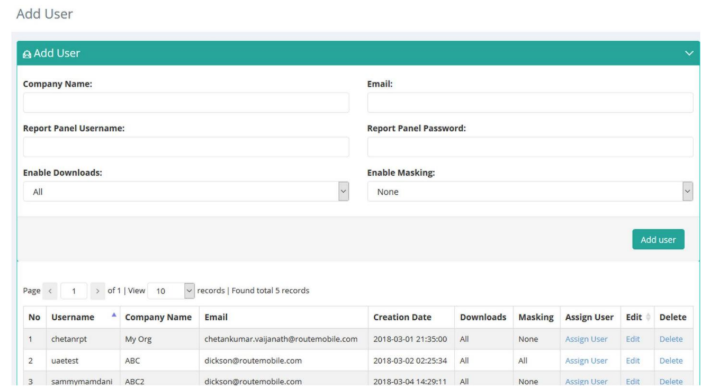
Add User Page
To add a report-panel user
- In the Company Name box, type the required company name.
- In the Email box, type the email address.
- In the Report Panel Username box, type the required username.
- In the Report Panel Password box, type the required password.
- From the Enable Downloads list, select one of the following options:
- All: Lets the user view all reports.
- Summary: Lets the user view only summary reports.
- Logs: Lets the user view only log reports.
- None: Blocks all report views.
- From the Enable Masking list, select one of the following options:
- None: Lets the user view all report columns.
- All: Blocks all report columns.
- Mobile Number: Blocks the mobile number column’s content.
- Message Content: Blocks the message column’s content.
- Sender: Blocks the sender column’s content.
- Mobile Number & Message Content: Blocks both the mobile number and message column’s content.
- Mobile Number & Sender: Blocks both the mobile number and sender column’s content.
- Message Content & Sender: Blocks both the message and sender column’s content.
- Click Add user.
- Verify that the report-panel user appears in the table below.
Edit or delete a report-panel user
Use the user table to edit or delete an existing report-panel user.
- To edit a report-panel user, click Edit for the corresponding user.
- Review the user information populated in the Update User section.
- Make the required changes.
- Click Update.
- To delete a user, click Delete.
- If you receive a confirmation message, click OK.
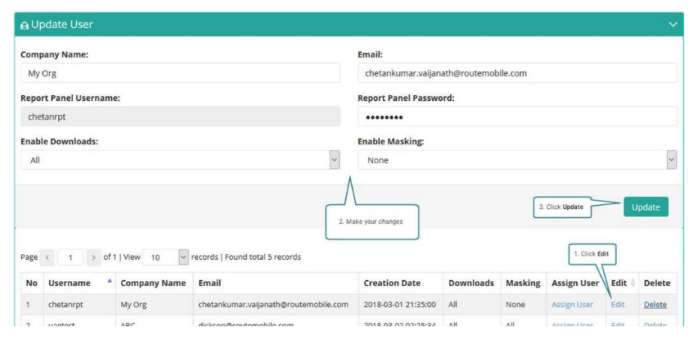
Edit Report-Panel User Information
Assign a report-panel user to a user account
Assign a report-panel user to a user account from the user table.
- Click Assign User for the corresponding user. The Assign User page appears.
- From the Select User list, select the required user account.
- Click Assign User.
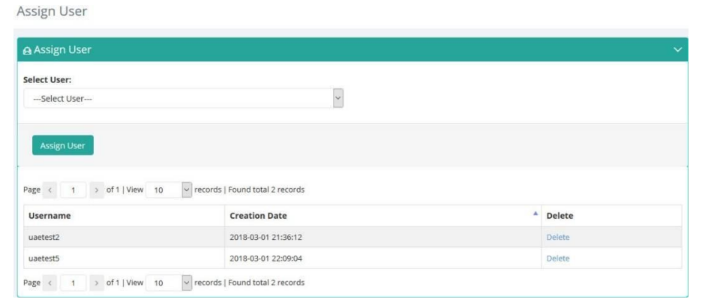
Assign User to Account
Updated 11 days ago