Getting Started on the Route Mobile Panel
Sign in to access WhatsApp messaging, dashboards, opt-ins, reports, and templates from one place.
Your Credentials
Getting started is easy — enter your credentials to access your WhatsApp workspace.
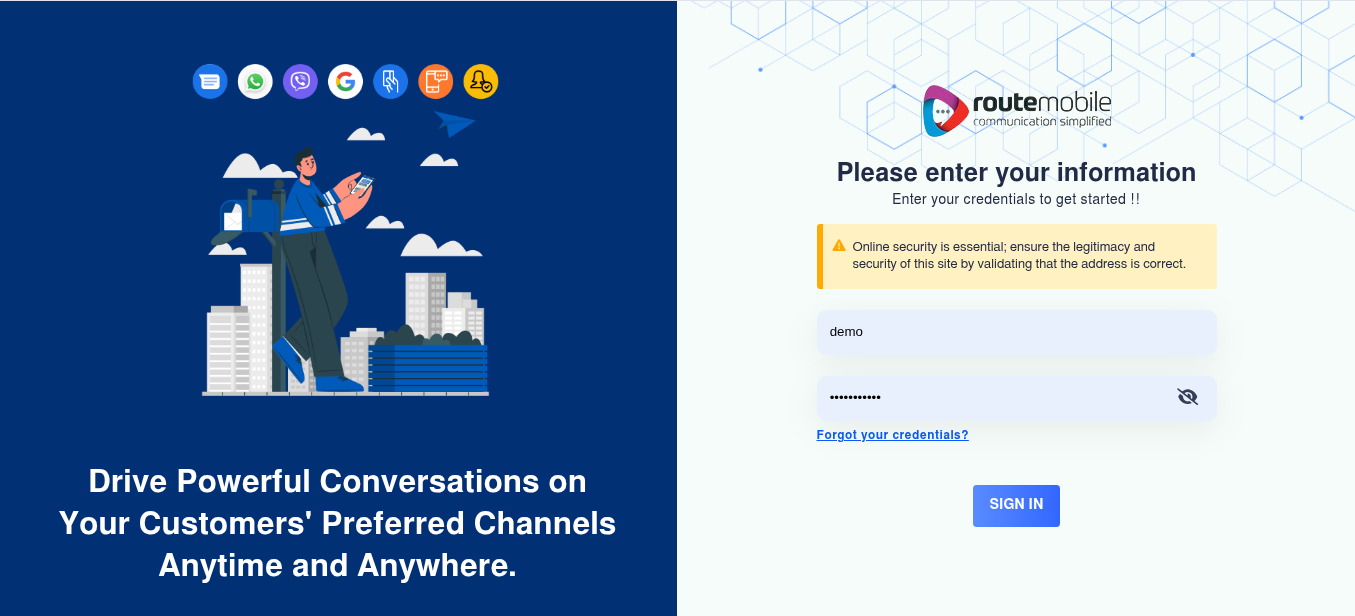
- Go to myaccount.rmlconnect.net/login
- Enter your username and password
- Click Sign In
Select WhatsApp
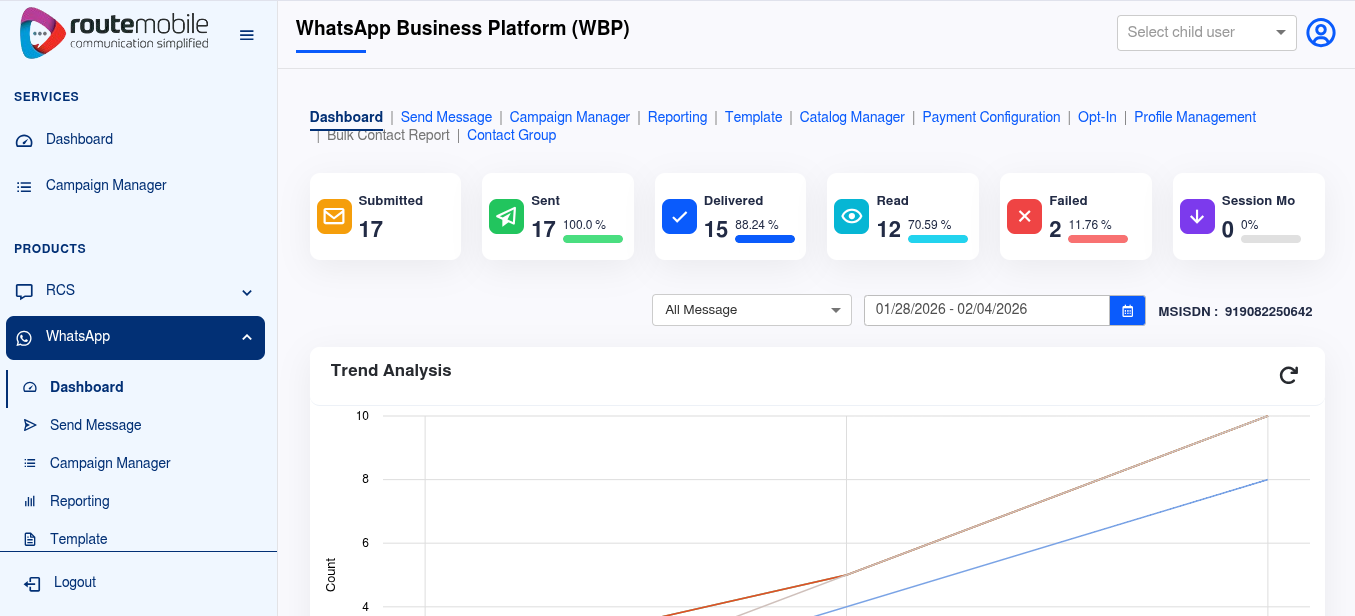
- Once you enter the main page, you will find icons of all the Route Mobile products on the left side.
- Click the WhatsApp icon, and a pop-up will appear.
- You may select one of the following:
- Dashboard
- Send Message
- Opt-In Dashboard
- Reports
- Templates
How to send a WhatsApp Message?
Select Operation Type
When you click on the Send Message tab, a new window appears where you can select the operation type.
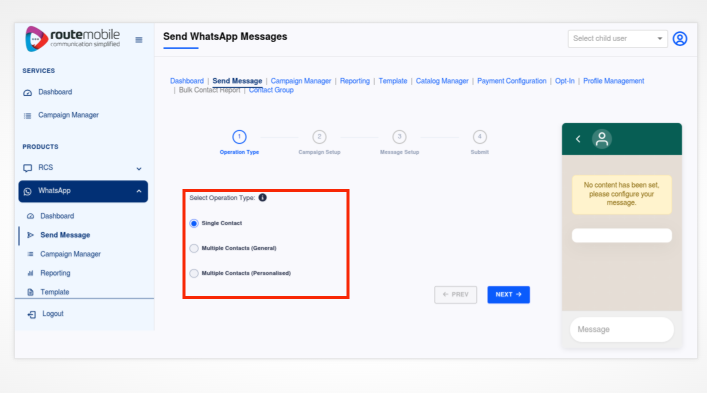
Select a suitable operation type:
-
Single Number
When you want to send a message to a single number. -
Multiple Numbers (Generalized Messages)
When you want to send the same WhatsApp message to more than one number. -
Multiple Numbers (Personalized Messages)
When you want to send personalized WhatsApp messages to multiple contacts.
Campaign Setup (Message Setup - Single Number)
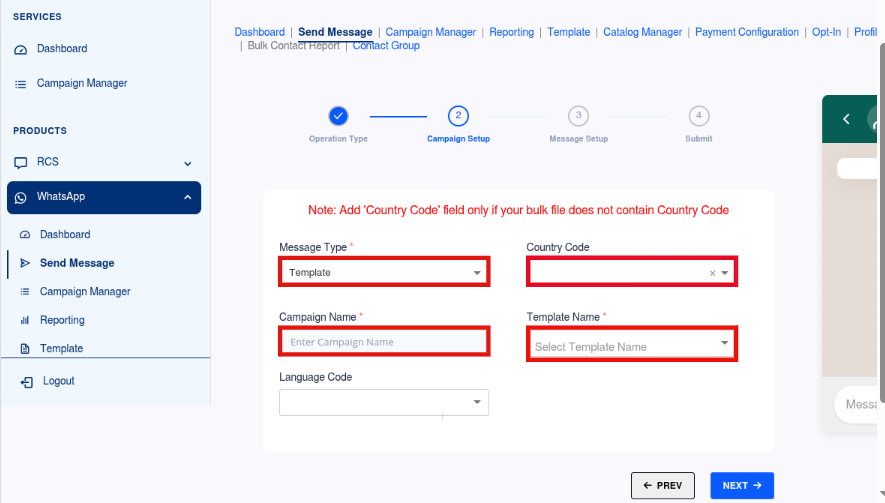
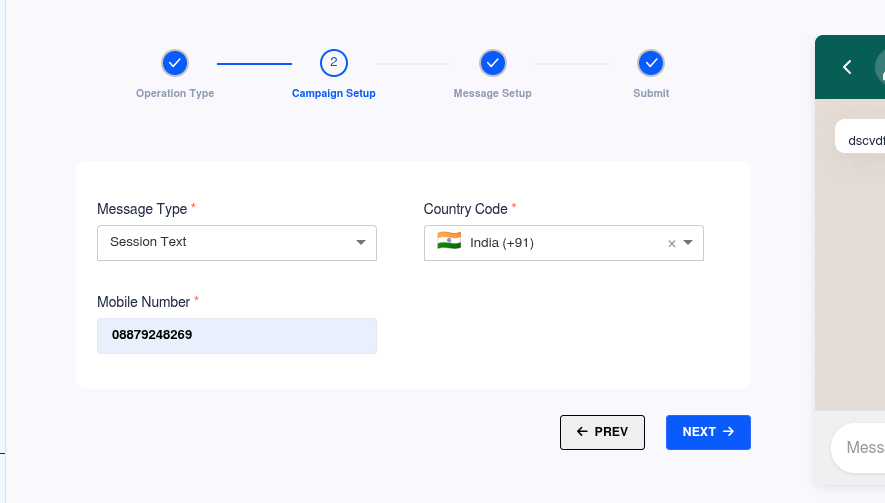
Select the Message Type from the dropdown list.
WhatsApp Session Message
-
Template (Text/Media)
Brand sends a text message or a multimedia message with image/video. -
Quick reply template
Brand shares the message with quick reply buttons where a customer can click to respond back. -
Call to action template
Brand can include a button with a hyperlink that redirects the customer to another source.
To send the message:
- Choose the country code.
- Enter the mobile number and click Next.
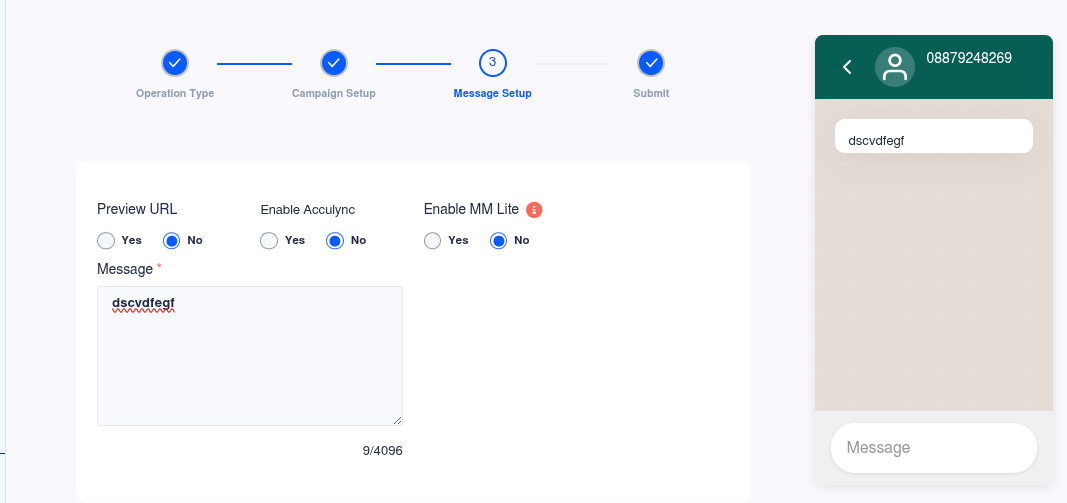
- Type the message that you want to send to your customer.
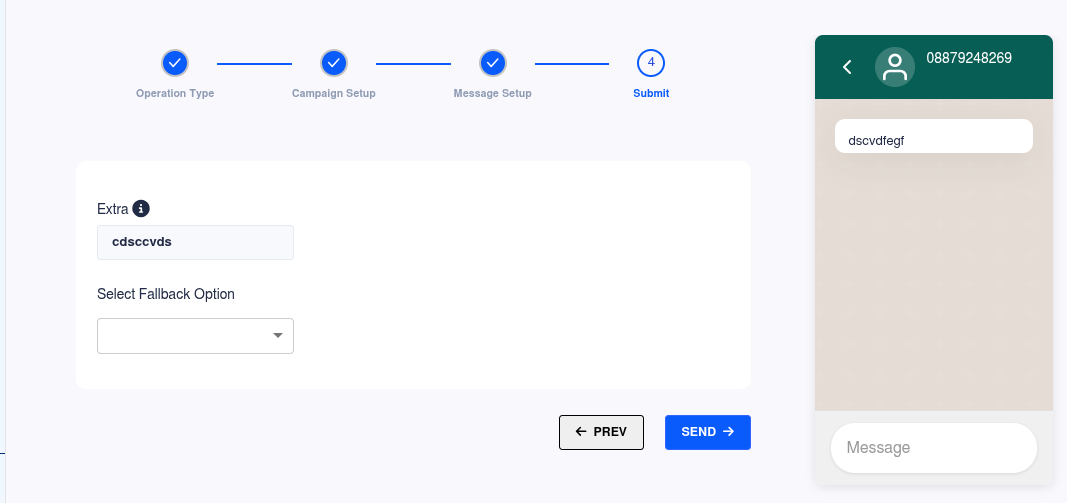
- If you need extra information in delivery reports, type it in the extra information box.
- Click Send.
- After the message is sent, you will receive a notification in the right corner stating, “WhatsApp message has been sent successfully.”
Campaign Setup (Message Setup - Multiple Numbers)
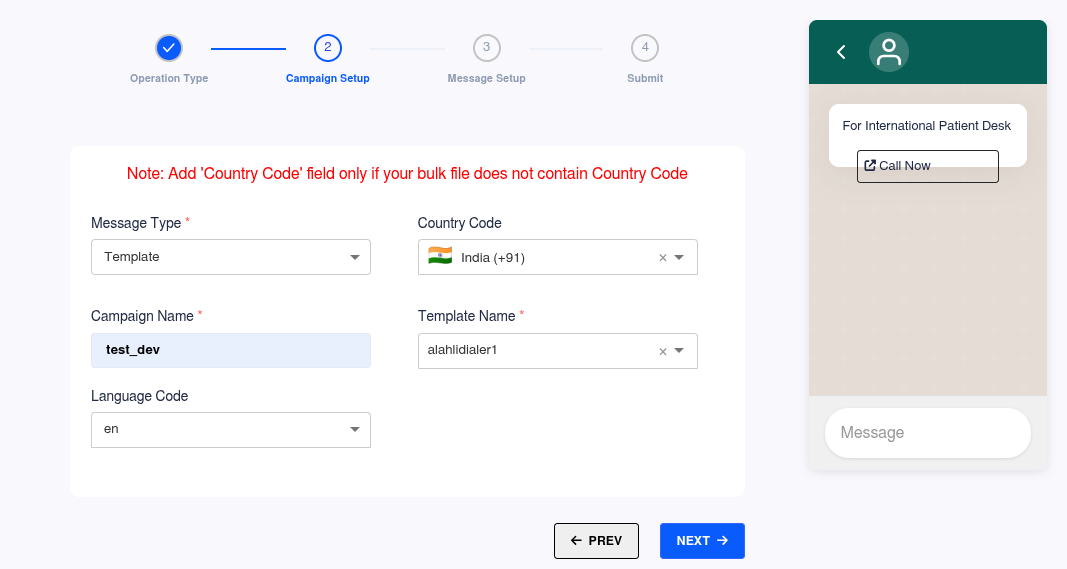
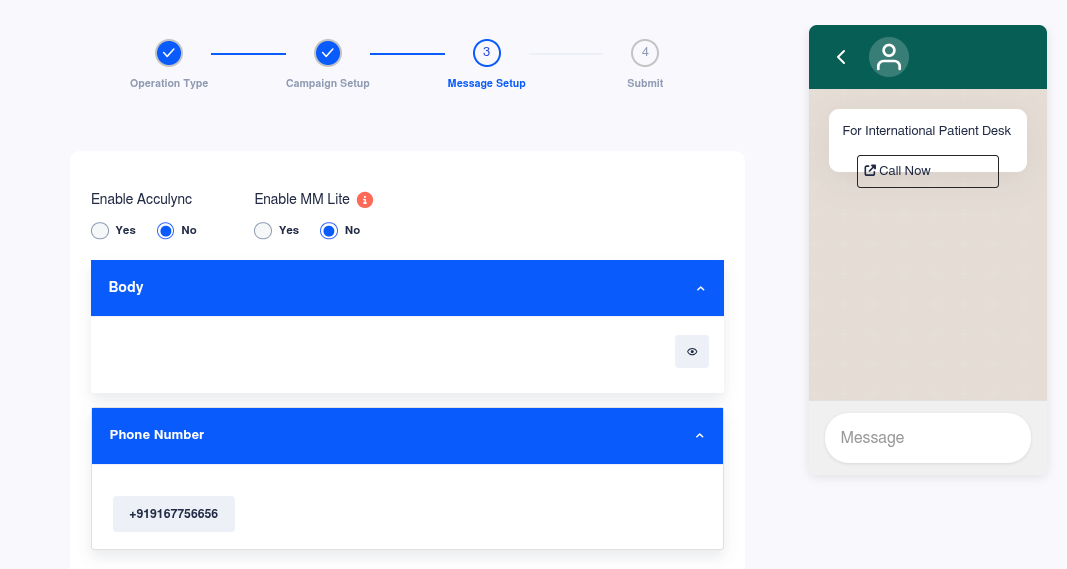
Points to note while setting up the campaign
- Campaign Name: Enter your campaign name.
- Sender Number: Select the brand’s number from which you need to send the message.
- Template name: Only the approved list of templates appears as per the account.
- Language code, Media Header: Based on the selected template, the language code, message type, header, and button position appear by default and cannot be changed. If the template has multiple languages, those languages appear in the dropdown.
- Header Media URL: Enter the correct URL.
- Message Body: Enter the details that you want to reflect in the variables of the message body. If a template has 3 variables, the system should not allow adding more than 3 variables in the body section.
- Button Details: Button details auto-populate, such as Call to Action button or Quick Reply button.
- Button URL: Add the variable in case of a dynamic URL.
- Click Next once you complete the setup.
Message Setup (Multiple Numbers)
There are different types of templates available for the user.
Here is a sample template that a brand can customize as a personalized message:
- Name of the Patient
- Hospital Name
- Test Name
The details will be entered in the respective sheet with a particular format.
Note: Sample file format is given in the next slide.
Sample file format
| Patient Name | Hospital Name | Test Name |
|---|---|---|
| John | Route Hospital | Full Body Checkup |
| Denver | Route Hospital | Blood Sugar |
| Sam | Route Hospital | ECG |
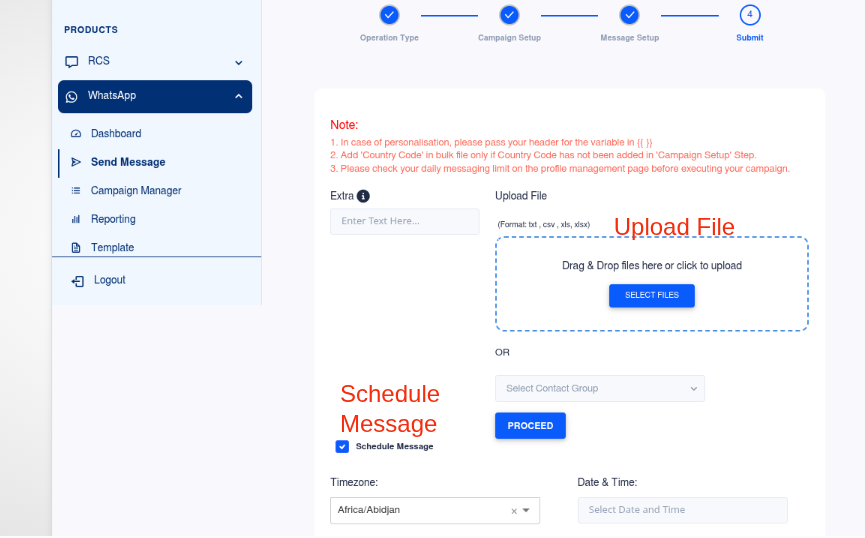
-
Multiple Numbers Upload (Generalised Message Upload)
Upload only end user phone numbers in the upload file. -
Multiple Numbers (Personalised Message Upload)
Upload end user phone numbers and headers passed in header URL, variables, dynamic URL, and extra field in the upload file. -
Schedule (Time Zone & Date/Time)
Brand can schedule for a certain date and time when the message needs to be sent to the user.
Note: Click Multiple numbers guidelines for the detailed instructions.
Multiple numbers guide should be included for reference similar to template guidelines.
WhatsApp Dashboard
Choosing Date & Message Type
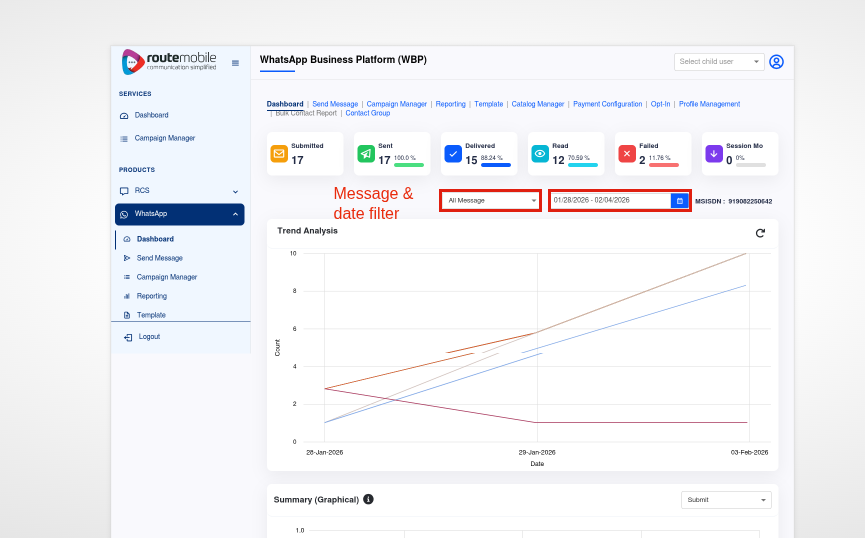
On the main Dashboard, you will see:
-
Date Range Selection
Users can select the Start Date and End Date for the details they would like to see. -
Message Type Selection
Select Message Type: Template & Session Message (MO/MT) or All (for both).- Template Messages: Notification messages are considered template messages.
- Session Messages: Conversational messages using a two-way communication channel fall under session messages.
-
Enter the Mobile Number
Enter the particular mobile number on which you would like to retrieve the analysis.
Trend analysis
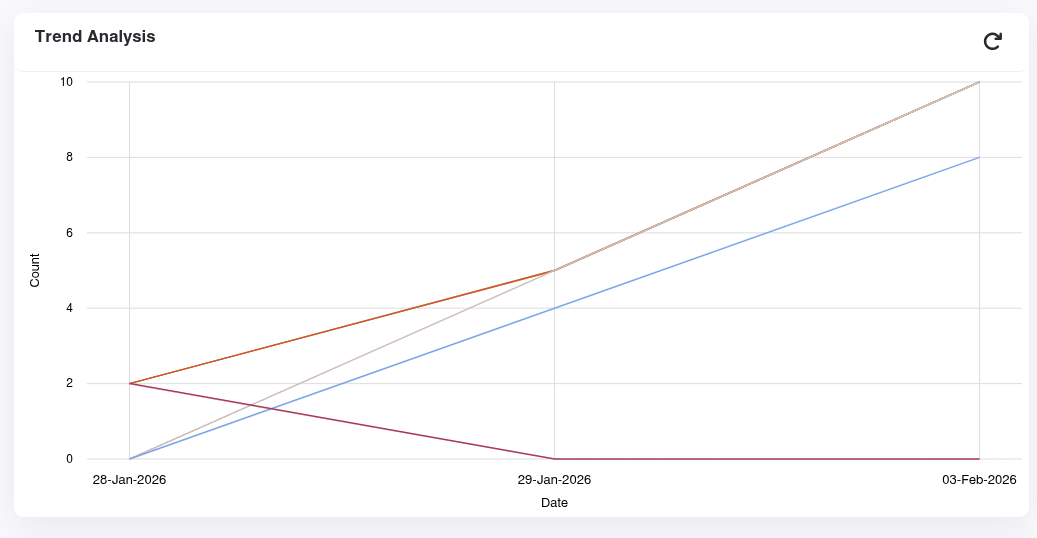
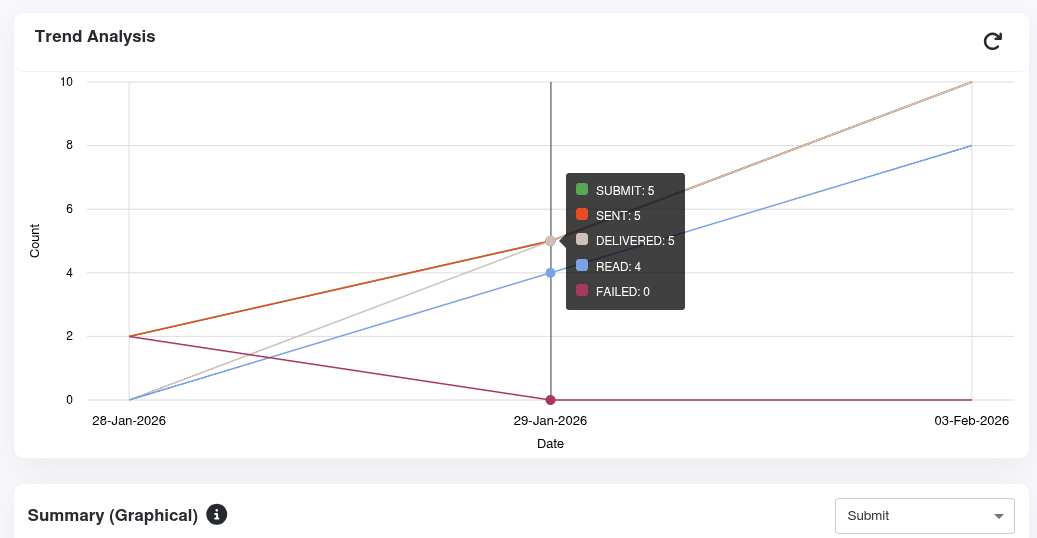
Trend analysis
A graphical representation of total messages.
- Submitted
- Sent
- Delivered
- Failed
- Read
- Fallback
Click the percentage button on the right corner.
The data will be converted as a percentage of Messages Submitted, Sent, Delivered, Read, and Failed, and it will be displayed in the same trend analysis window.
Summary & Geographical analysis
From a detailed campaign summary to location-wise analysis, media files shared, and user behavior data, the dashboard shows it all.
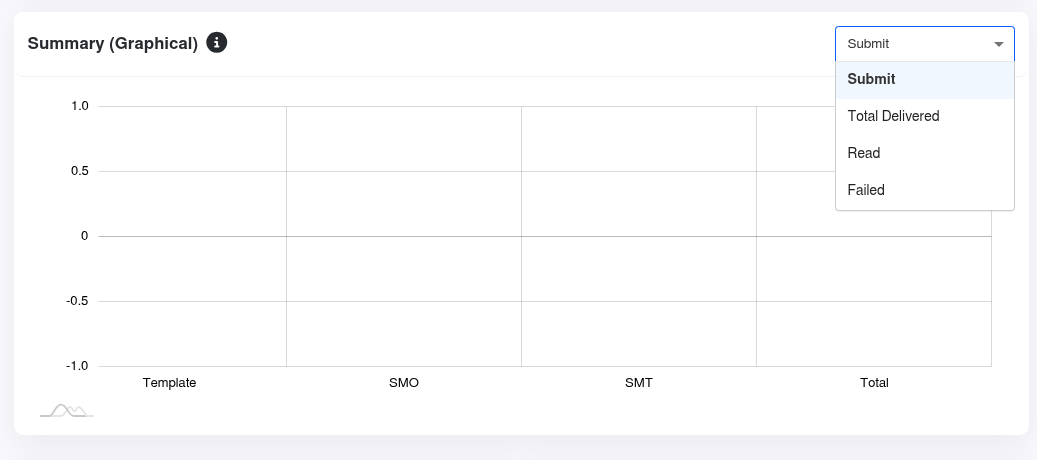
- Summary (Graphical Representation)
This provides a graphical summary of Messages Submitted, Total Delivered, Read, and Failed.
- Geographical analysis
This provides a location-wise analysis of WhatsApp Business messages.
Summary analysis
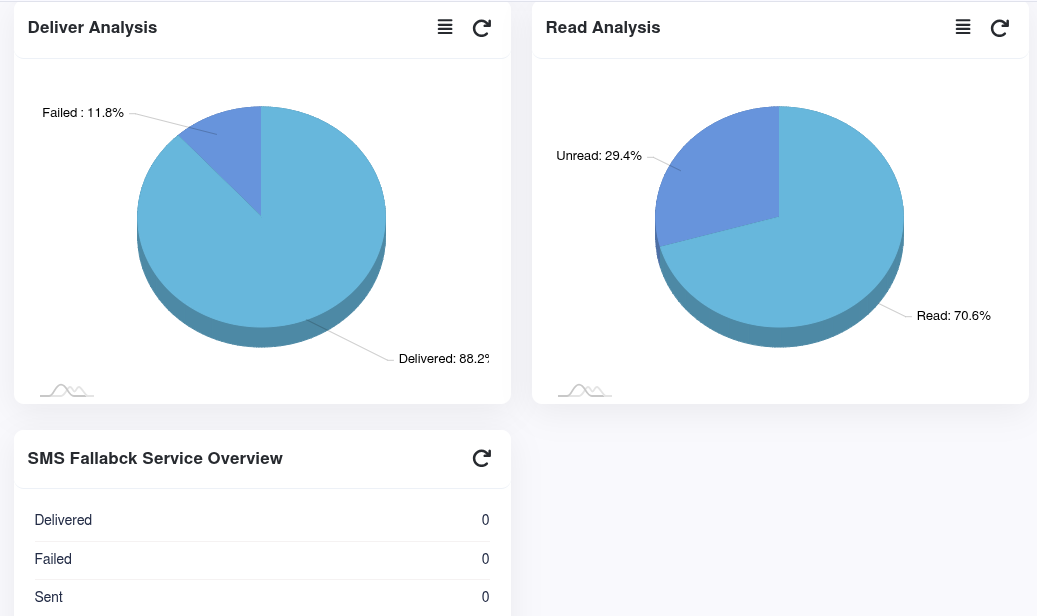
Summary (Count)
- Total Submitted: The total mobile numbers uploaded in a campaign.
- Total Sent: The total number of WhatsApp messages sent to WhatsApp.
- Total Delivered: Total number of WhatsApp messages delivered to the user.
- Total Received: Total number of incoming messages received from the users.
- Total failed: Total number of WhatsApp messages that have failed to be delivered.
Media analysis
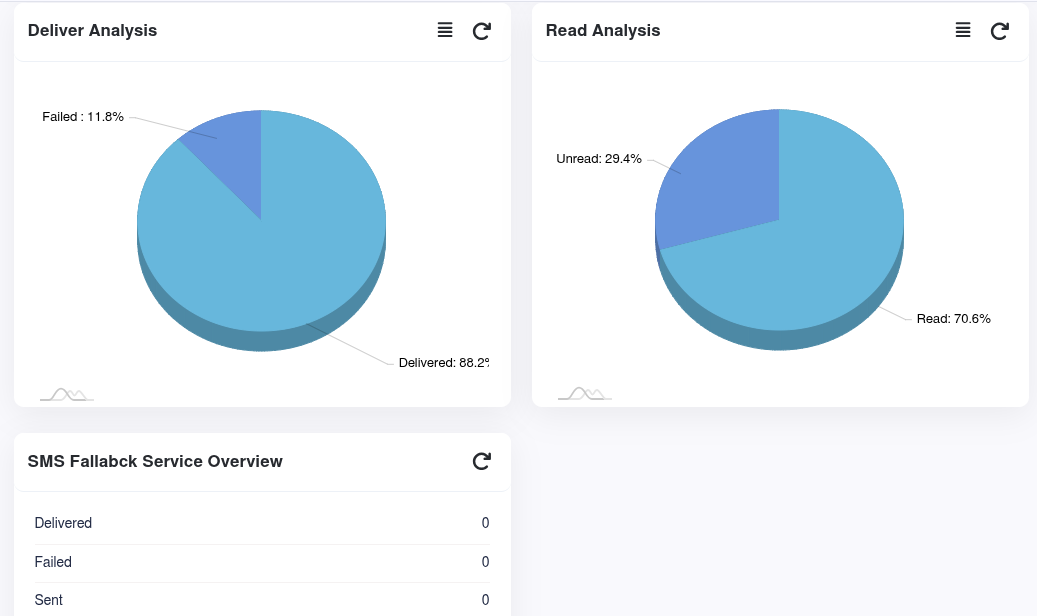
Media Analysis (Count)
Media Type Analysis provides detailed analysis for the following attachments or rich media used in WhatsApp messages:
- Button: Clickable buttons attached in WhatsApp messages.
- Call To Action: Call to action buttons attached in WhatsApp messages. This can be a URL redirection button, a direct number dialer to the brand, or both.
- Image: Pictures attached in WhatsApp messages.
- Interactive List: Messages including a menu of up to 10 options.
- Interactive Reply: Multiple reply options from which users can select what they want from your business.
- Quick Reply: The users can select the desired quick reply. The message will automatically appear in the text input field.
- Text: Number of text-based messages sent in WhatsApp.
- Template and Media Templates: Number of templates sent in WhatsApp.
- Location: Location attached with the WhatsApp message.
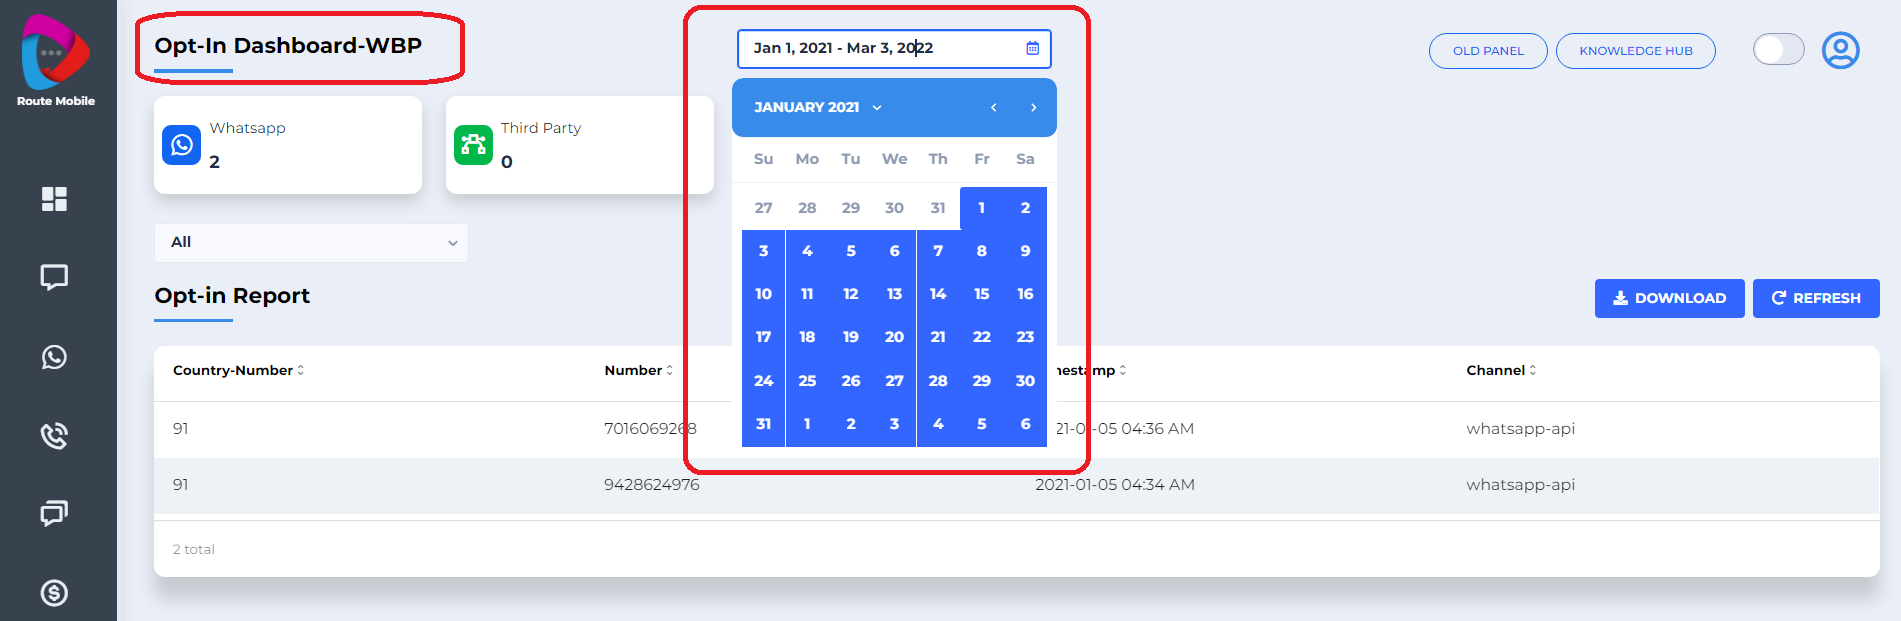
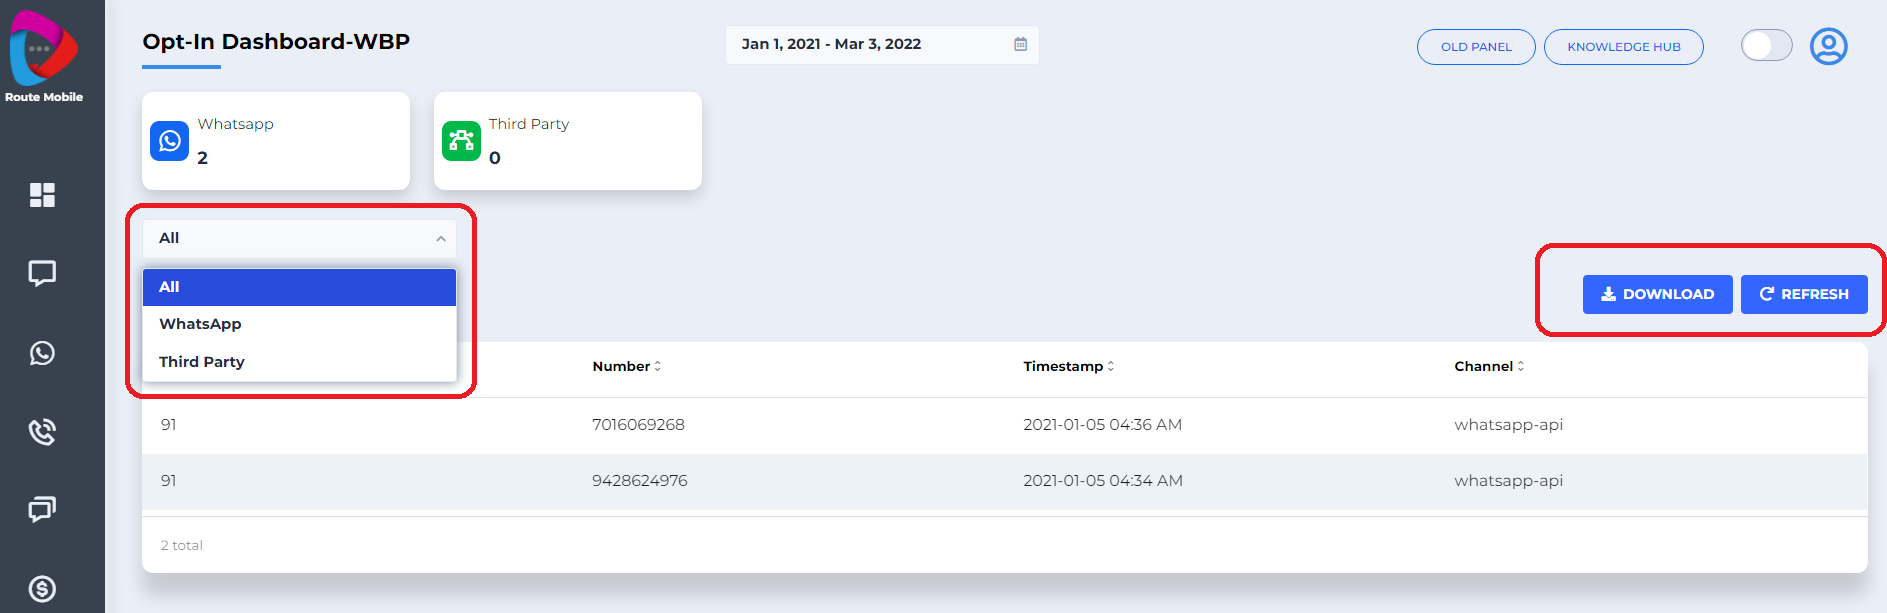
WhatsApp Opt-in Dashboard
WhatsApp Reports
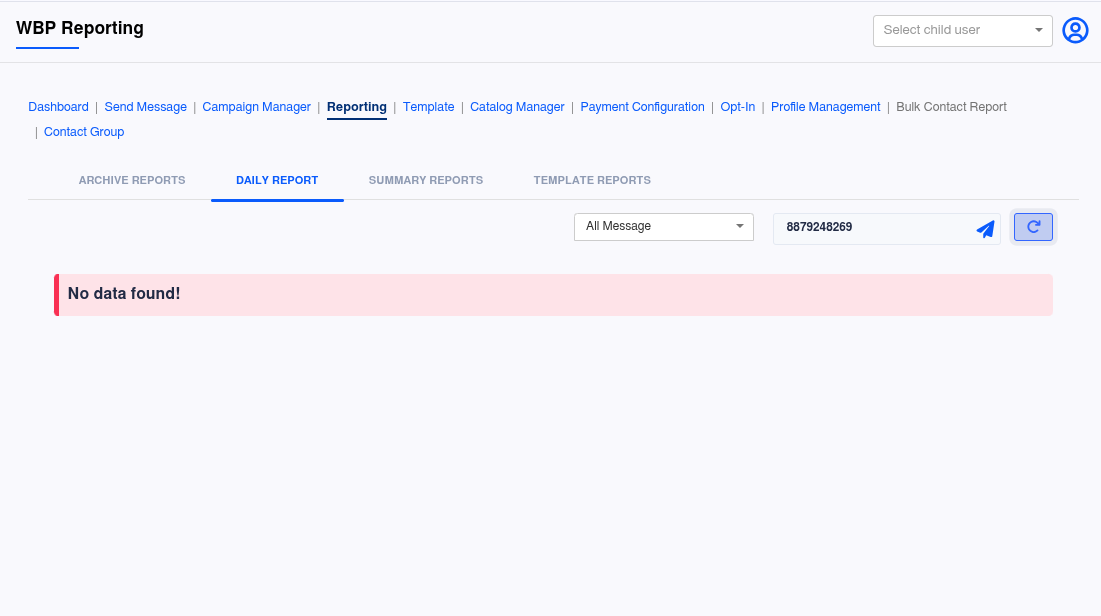
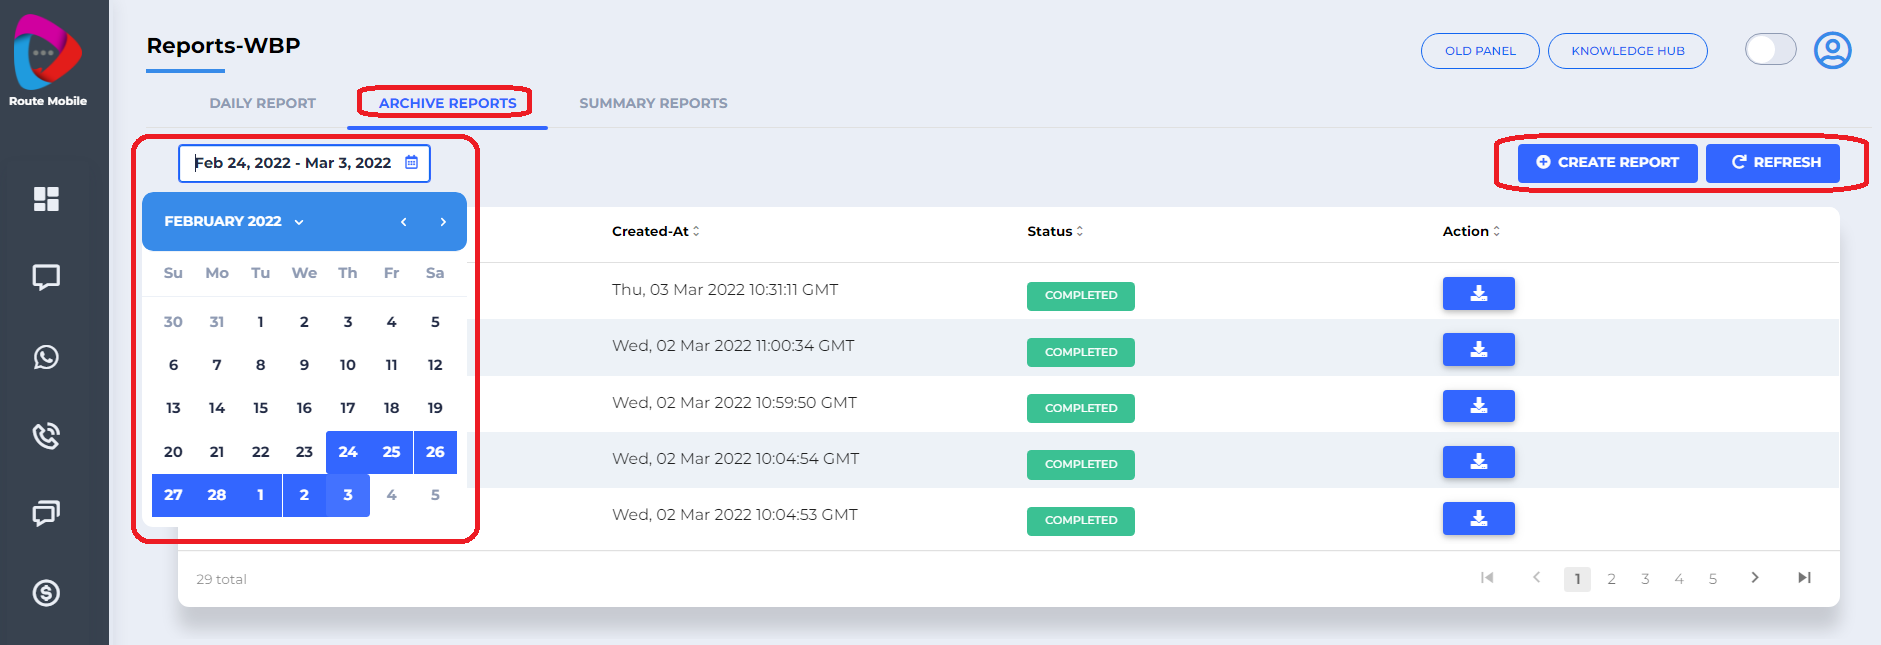
Archive Reports
Create Report
- Choose the Start date and End date.
- Create a detailed report by clicking the Create Reports button.
- Choose projections to create the report.
- Click Submit Your Report to submit the creation request.
- Your report creation request will be displayed in the Reports section with Active status.
- Once the download is done, the status changes from Active to Completed. Your file is ready, and you can click the Download button to get the report.
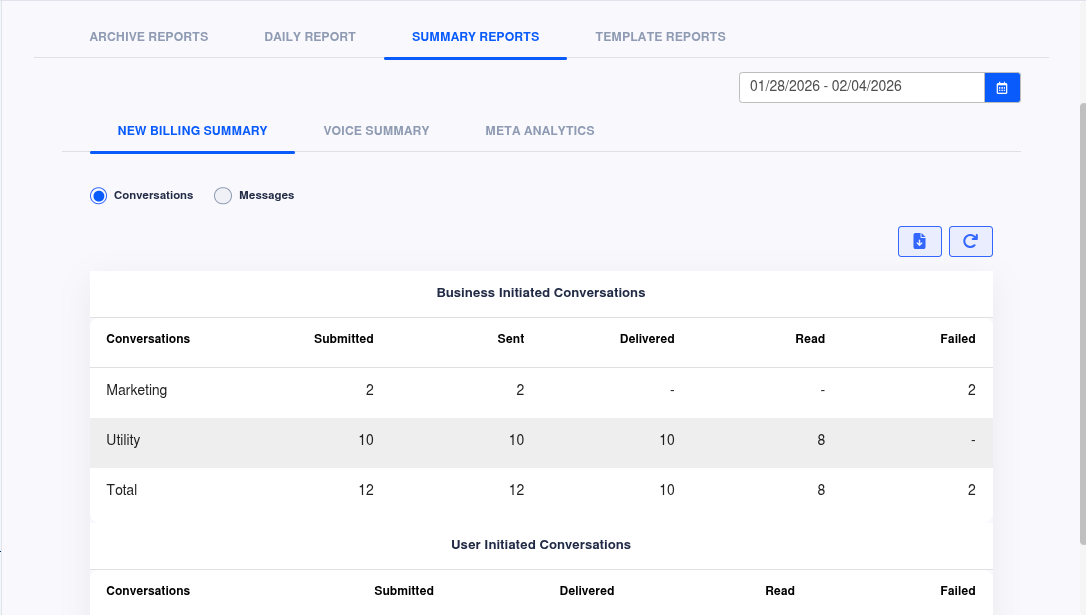
Template
Template Creation Best Practices
Common rejection reasons
- Formatting is incorrect. Proofread for spelling and grammar before submitting for review — messages with errors may be flagged as spam.
- Incorrect variable formatting. Use variable parameters, such as
{{1}}and{{2}}, with exactly two curly brackets on each side.- Ambiguous parameter purpose. If reviewers can't tell what a parameter or media type is for, the template will be rejected. Always include a sample.
- Language mismatch. The selected template language must match the content's actual language. For example, selecting Spanish but writing in English will be rejected.
- Unsupported language mixing. "Hinglish," "Spanglish," and similar mixed-language content will not be approved.
- Incorrect test template format. If submitting a template purely to test your API connection, it must follow this exact format — any variation will be rejected:
Message template name: test
Content: Hello 1
- Shortened URLs. Don't use link shorteners, such as bit.ly, tinyurl, or goo.gl, because they obscure the destination.
- Mismatched URL domain. The URL domain in your links must belong to your business.
Tips to accelerate approval
-
Use clear, descriptive template names, such as
bus_ticket_detailsinstead oftemplate_014. -
Remember reviewers are external to your business — give them context for how the template will be used.
-
All appeals for rejected templates require a sample, submitted via Direct Support.
-
To reopen the 24-hour customer window, reference the earlier conversation thread. For example:
"I'm sorry that I wasn't able to respond to your concerns yesterday but I'm happy to assist you now. If you'd like to continue this discussion, please reply with 'yes'."
Other guidelines
- Provide a realistic example of the data your template will use. Do not include confidential or personal information. This helps reviewers understand the intended message and speeds up approval. Provide working sample links where relevant.
- Supported button types:
PHONE_NUMBER,URL(static and dynamic), andQUICK_REPLIES. - Undelivered messages, such as messages to an offline recipient device, are retried for 30 days.
- A template name can have multiple language versions. If you delete that template name, all language versions are deleted with it.
- Once a template is deleted, its approved name cannot be reused for 30 days. Use a different name for new templates.
- Only the deterministic delivery policy is available: the template is delivered in exactly the requested language and locale. Fallback is deprecated.
- The number of parameters in your payload must match the number of parameters defined in the template's
hsmobject, or you'll receive a callback flagging a display issue. - Never hardcode links directly into template text — always pass them as a variable parameter.
Templates — WBP
Search and find your approved templates here.
- Filter by status: Approved, Pending, Rejected.
- Templates are listed with: Template Name, Created Date, ID, Category, Language, Status, Quality Score, and Rejected Reasons.
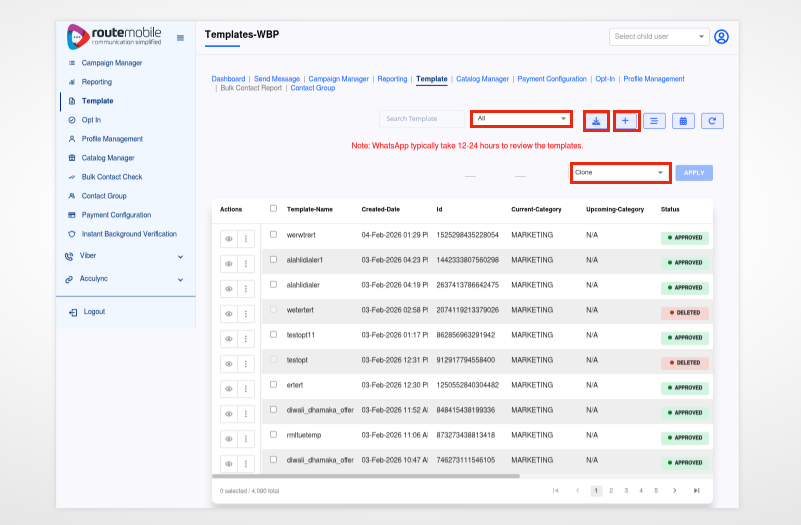
Actions:
| Action | Description |
|---|---|
| Download Template | Download the template |
| View | View the template's content |
| Delete | Delete the template |
Create a New Template
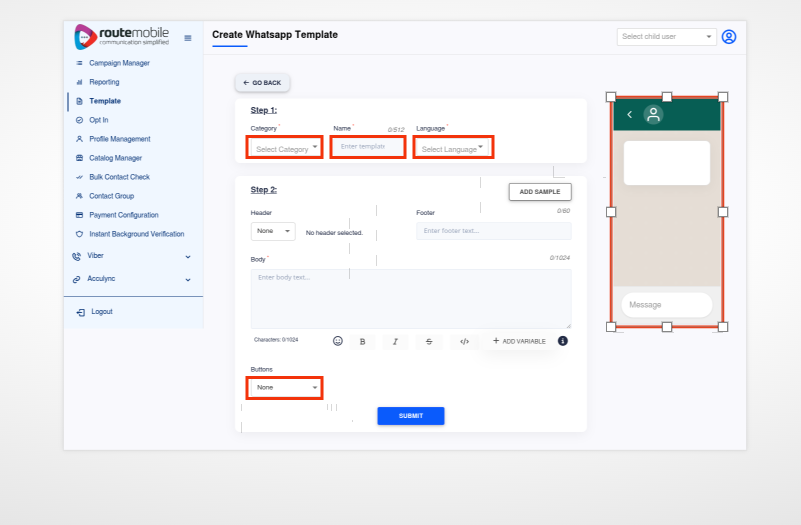
You can create a new template by filling in the following details:
- Enter the Template Name.
- Choose the Language(s) from the list.
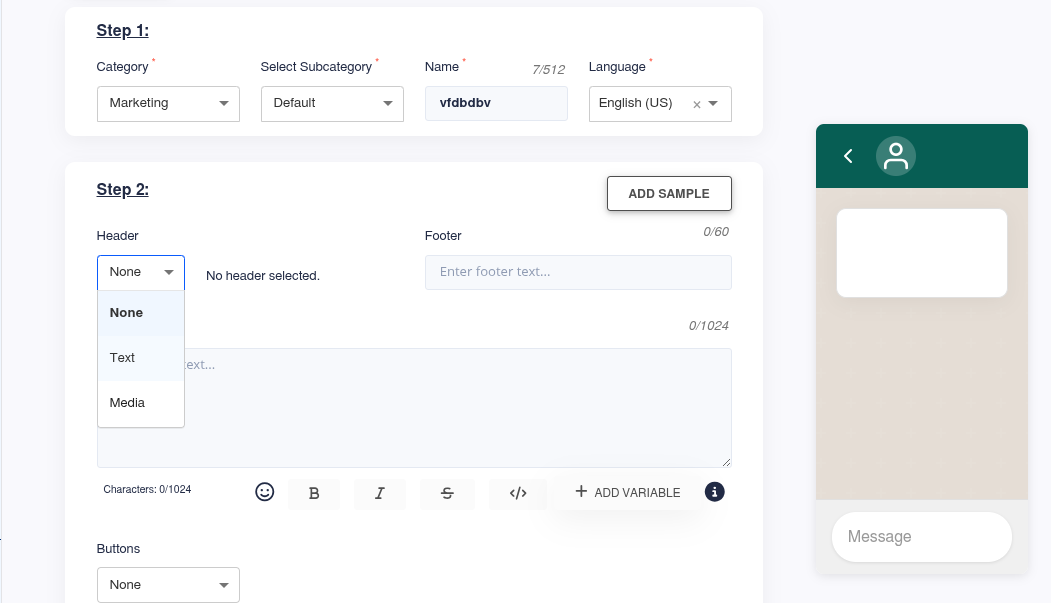
2. Choose any one of the Header Type below
- Text: Send only text information to the customer.
- Media: Send an image, video, or document along with text.
Enter the Header Text and Footer Text.
Type your message in the body.
Message Formatting: You can use different message formats like bold, italic, strikethrough, emoticon, etc.
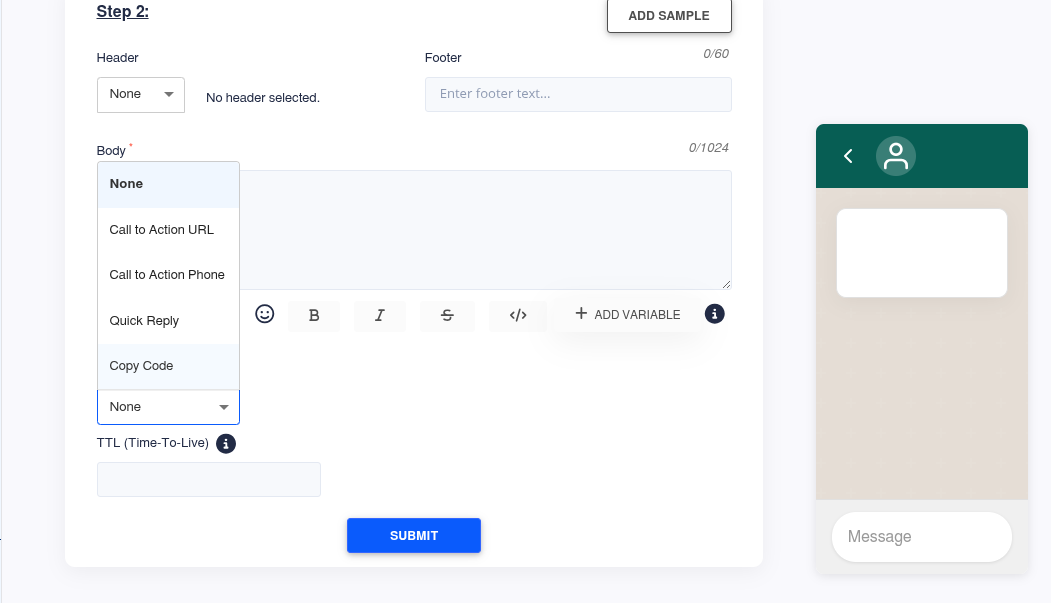
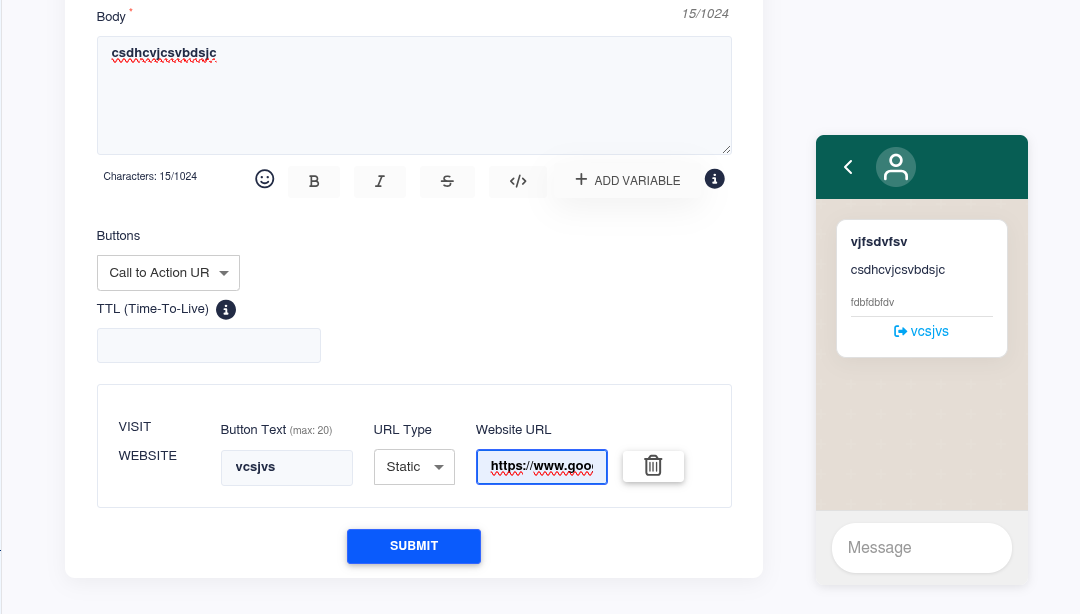
Updated 5 days ago