
Send SMS
Send SMS
The 'Send SMS' menu provides the ability to send messages through three different ways:
- Single SMS: Send SMS to any 100 mobile numbers including country code directly.
- Bulk SMS: Used for sending messages by uploading mobile numbers including country code from a text file.
- Group SMS: Used for sending messages to already defined groups or the distribution list in the address book.
All three ways provide the facility to schedule messages on a particular date and time. We will discuss each in detail in the following sections.
Single SMS
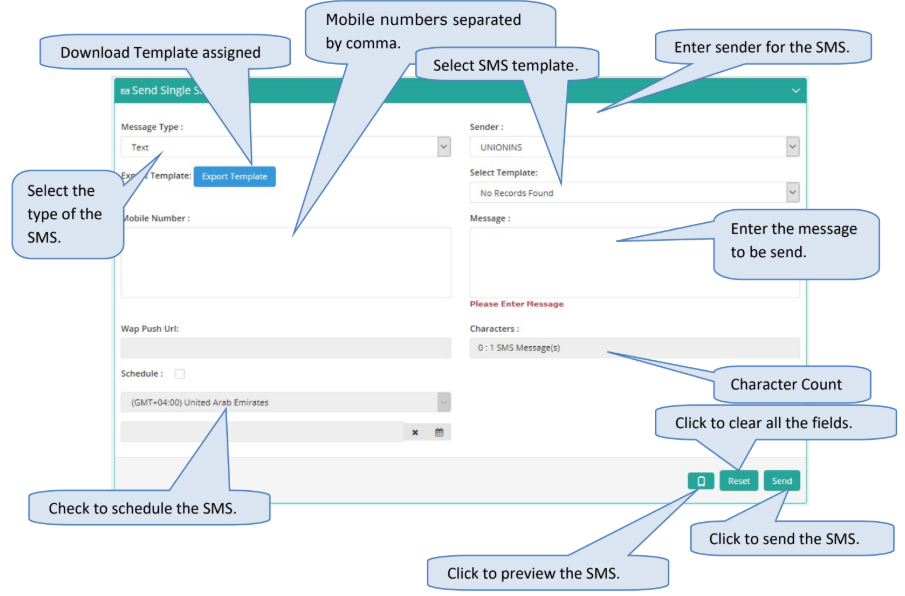
Single SMS allows users to send messages to up to 100 mobile numbers by uploading them in a comma-separated format.
Requirements
To send a message via Single SMS, you need to provide:
- Mobile numbers - including country code, in comma-separated format
- Sender ID - your sender identification
- Message type - the category of message
- Message - the content to send
Bulk SMS
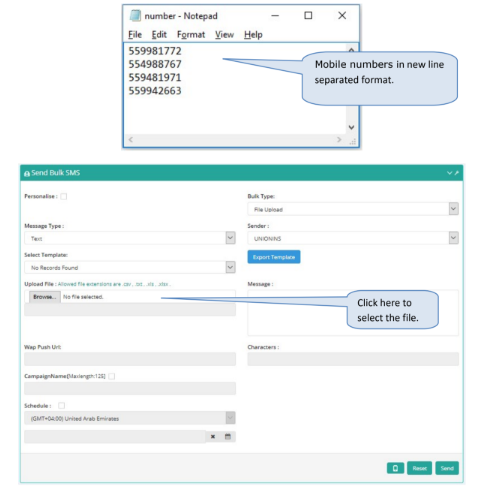
The Bulk SMS option provides a facility to send SMS to multiple users by selecting a text file (.txt) or comma-separated file (.csv) containing mobile numbers with country codes in a line-separated format, as shown below:
Excel Sheet Selection Features
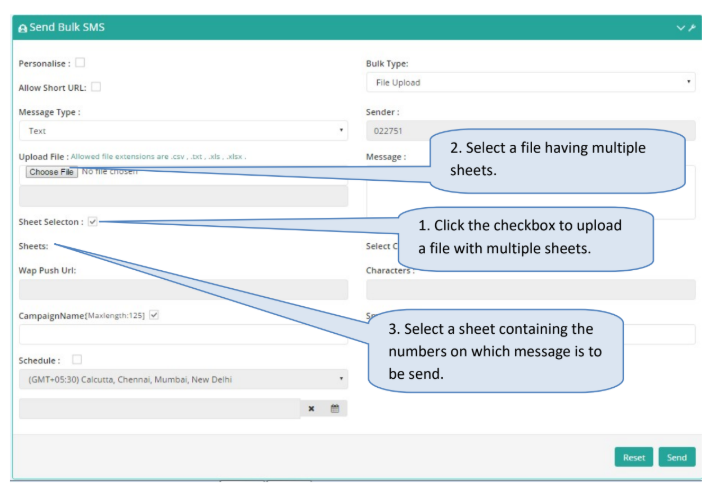
Sheet selection feature is available in normal bulk file upload and does not allow message personalization. Supported file formats are .xls and .xlsx.
Requirements
- File numbers must be placed in the first column of every sheet
- If numbers are not in the first column, the user will receive an error: "File Could not Uploaded"
Upload Process
- Before uploading: Click the 'Sheet Selection' checkbox when uploading a file with multiple sheets
- After uploading: Available sheets will be displayed for selection
- Note: Larger files may take additional time to display available sheets
- After selecting a sheet: Proceed with the regular upload process:
- Enter message
- Select date and time
- Complete upload
Though the sheet names are renamed in uploaded file, while selecting they will be displayed in their predefined format as sheet1, sheet2, sheet3 etc.
Personalized Bulk SMS
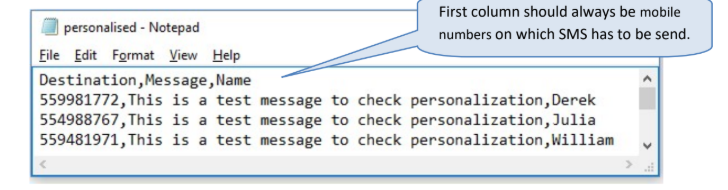
Bulk SMS provides the facility to send personalized SMS by selecting a comma-separated (.csv) file where:
- Mobile numbers (including country code) must be in the first column
- Additional data for personalization follows in subsequent columns
See the example below for the proper format.
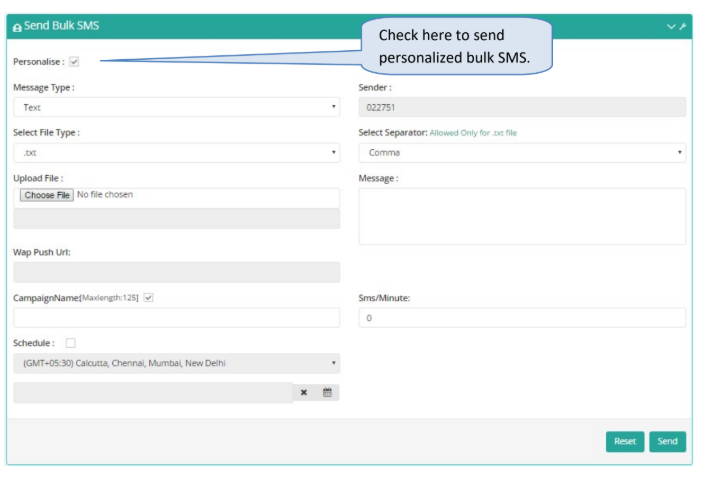
To send personalized Bulk SMS:
- Check the 'Personalize' checkbox
- Enter sender details
- Select message type
- Select the tags to compose the personalized message
Note: Using personalized bulk SMS, you can send SMS to a maximum of 10,000 mobile numbers.
UDF Tagging Feature
The UDF tagging feature is available in personalize message sending. It is an on-demand feature available for selected users.
What are UDF Fields?
UDF fields (User Defined Fields) are custom fields that serve as references to each individual message uploaded in Personalize Message.
Supported File Formats
.csv.txt.xls.xlsx
How It Works
- Upload File: Upload the same file you use for personalize message
- Add UDF Column: Include a column with user-defined data in your file
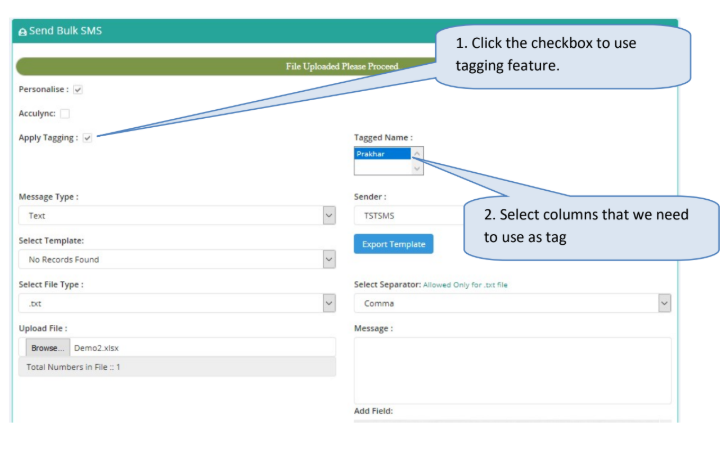
- Select Tags: When you upload the file and check the 'Apply Tagging' checkbox, select at least one tag from your file as a UDF tag
- View in Reports: The selected tag will be displayed in log reports
Key Constraints
- Maximum 2 UDF fields are allowed per upload
- At least one UDF tag must be selected when applying tagging
Group SMS
Group SMS provides facility to send message to the specific set of contacts. Group SMS works in the same manner as Bulk SMS. The only difference is that Group SMS takes mobile numbers including country code from the 'Address Book' in the form of 'Group or Distribution list'.
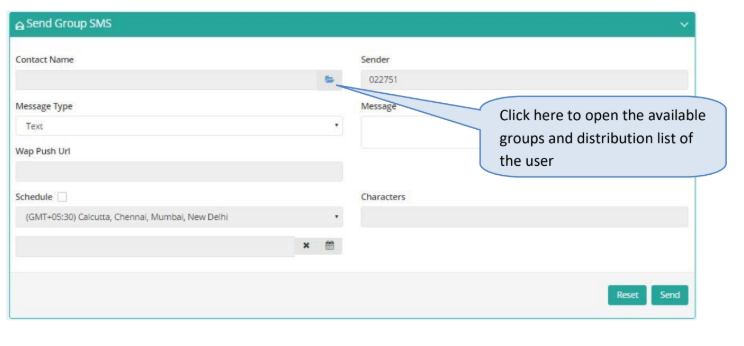
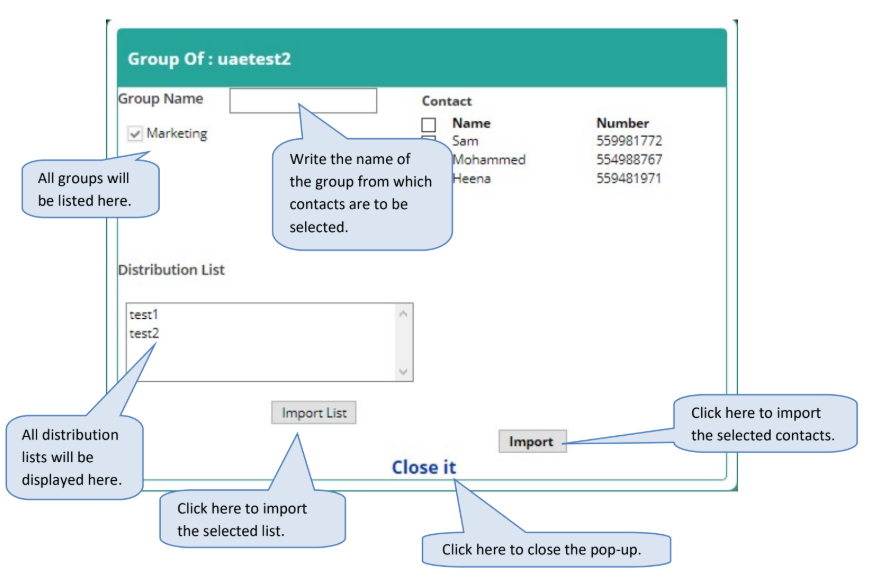
Contact numbers can be selected by:
- Clicking the 'Import Contact' link, or
- Selecting a distribution list and clicking the 'Import List' link
Scheduling SMS
Scheduling SMS facility lets users schedule messages as per their preferred date and time. All the Send SMS modes provide SMS scheduling facility.
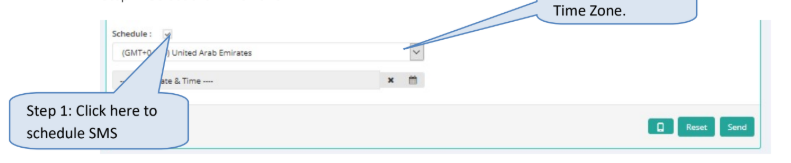
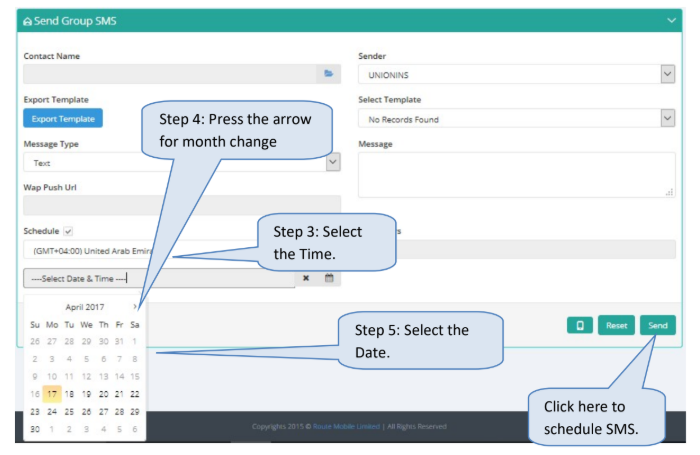
Follow these steps to schedule an SMS:
Step 1: Check the Schedule checkbox.
Step 2: Select the Time zone
Step 3: Select the Time on the pop-up calendar.
Step 4: Select the Month & Year on the pop-up.
Step 5: Select the Date on the pop-up calendar.
Updated 5 days ago