
Templates
Use the Templates page to create reusable message templates for SMS, WhatsApp, RCS, and Email campaigns in Ocean.
SMS templates
Use SMS templates to create reusable SMS content for global or country-specific template requirements.
Create an SMS template
To create an SMS template:
- Click Templates from the left panel.
- Select the SMS channel to open the SMS template page.
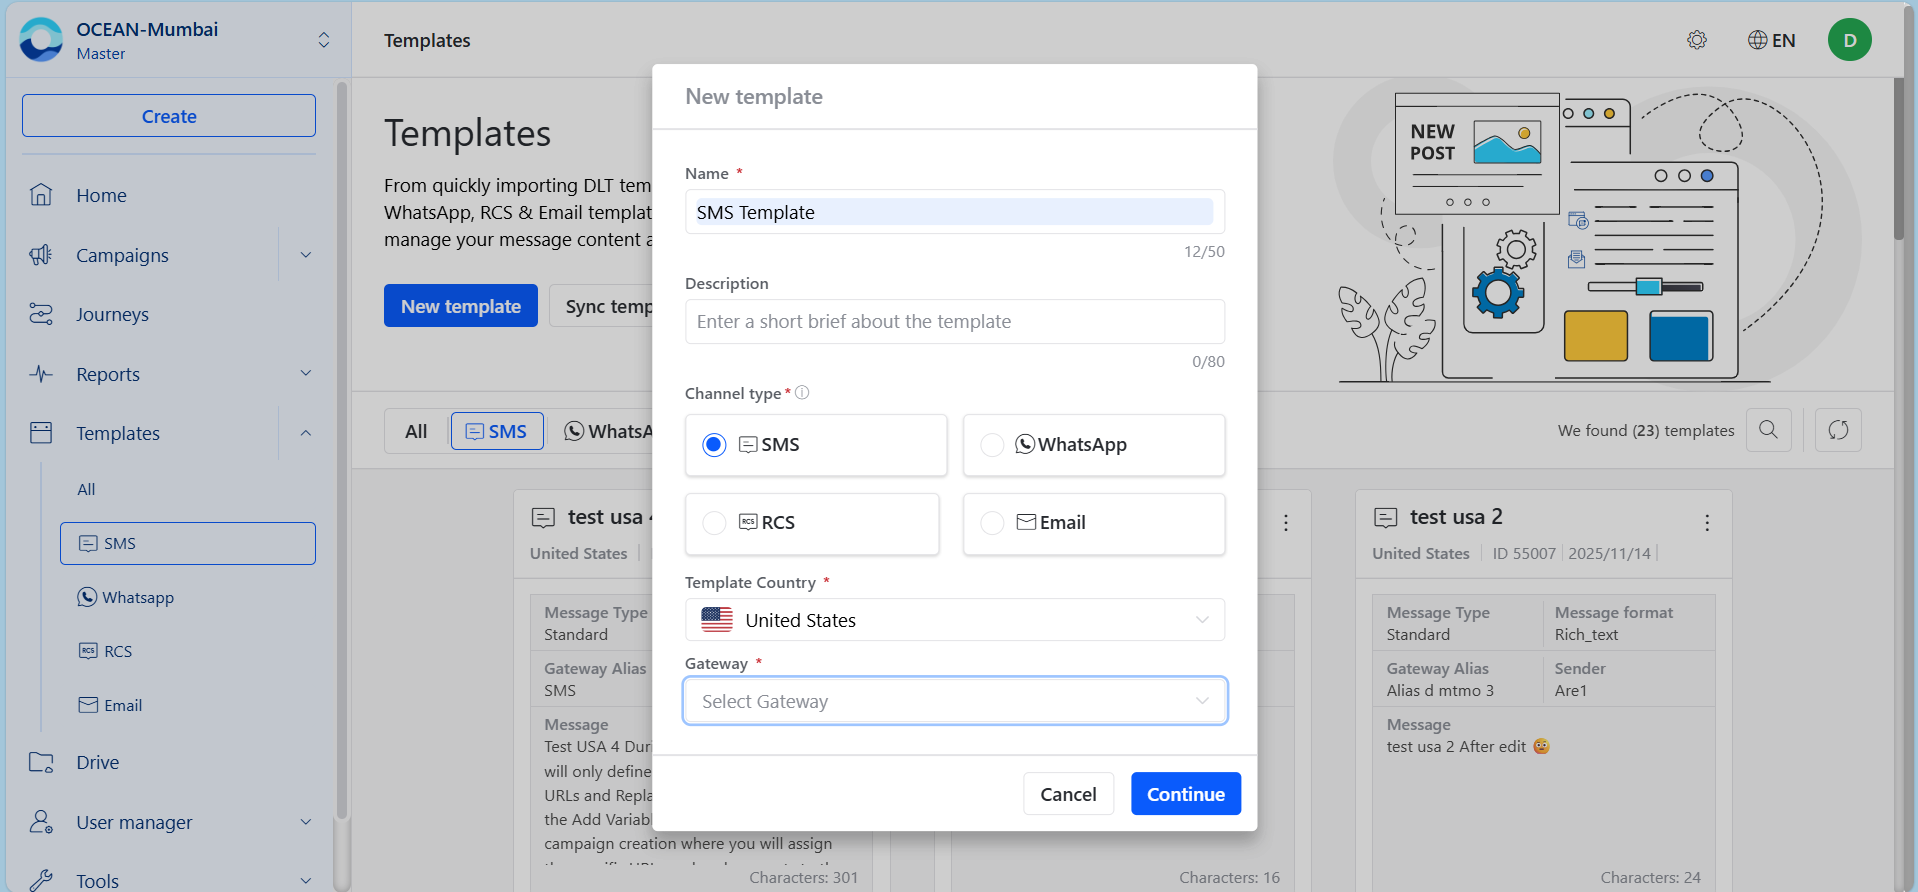
- Click New template. The channel type is selected automatically.
- Select the Template country from the dropdown.
- Select the Gateway added for the selected template country.
- Click Continue.
Countries listed in the template country dropdown require operator-approved content. For other countries, use Global as the template country.
Configure a Global SMS template
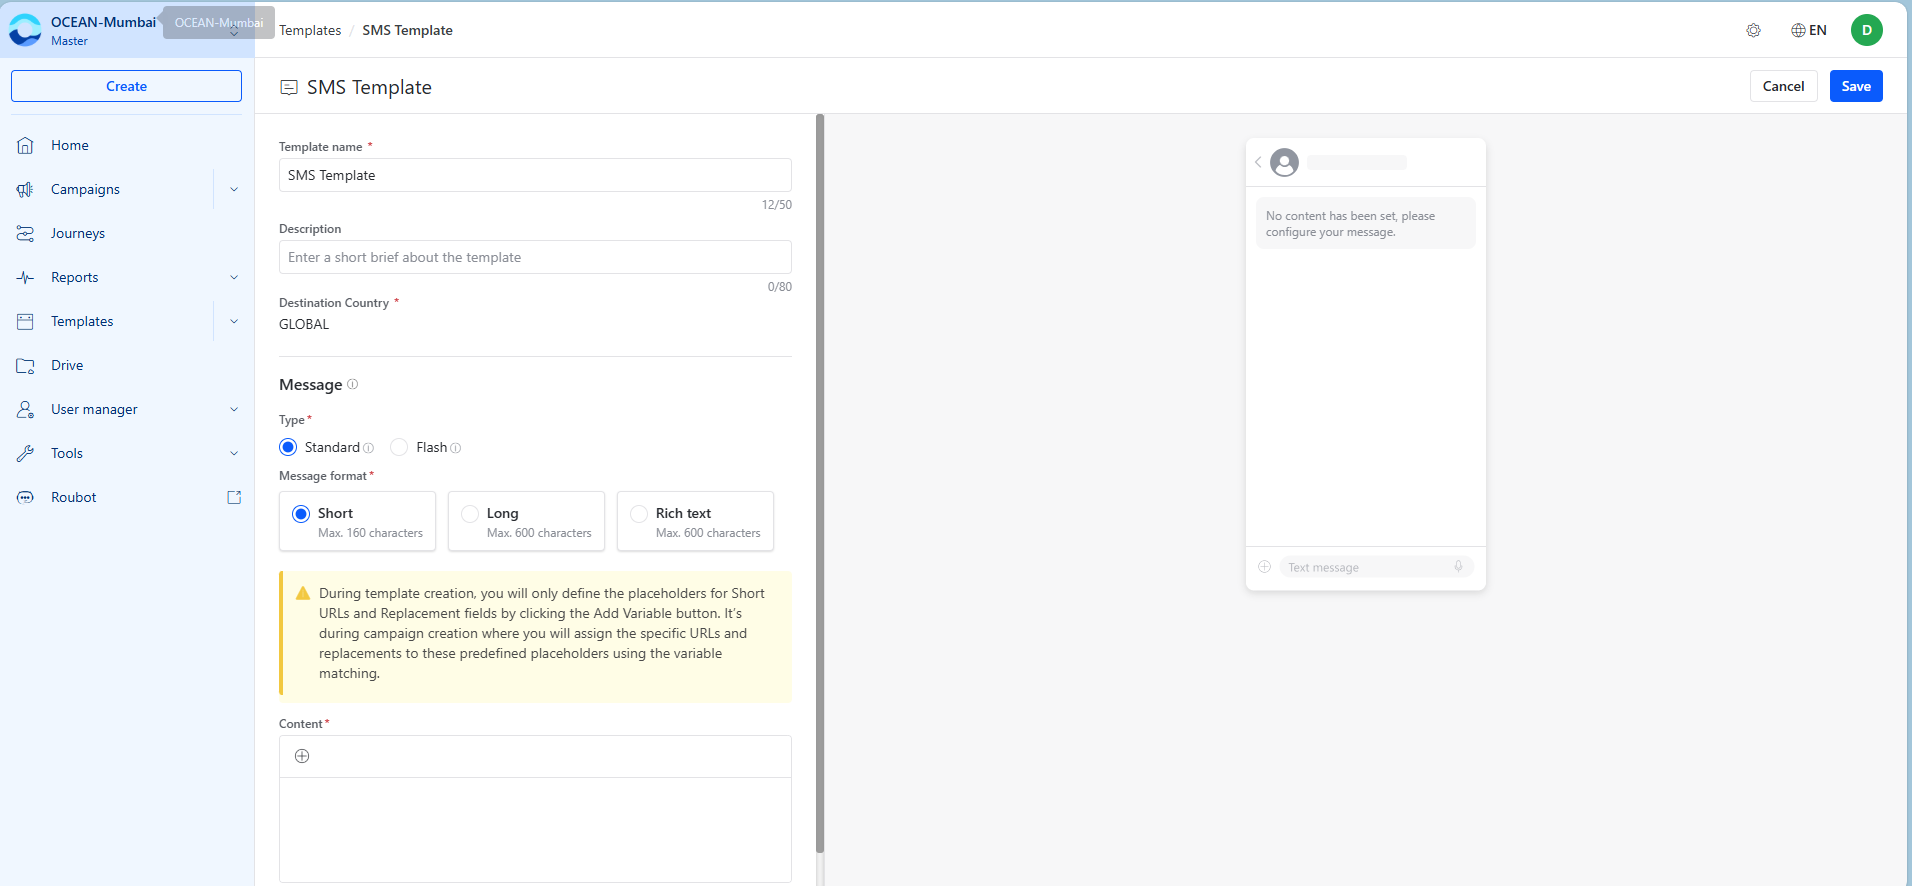
For Global template country:
- Select the message type and format.
- Add the message in the content box.
- Click the + button to add variables in the message body.
- Click Save to save the template in the template manager.
Configure a country-specific SMS template
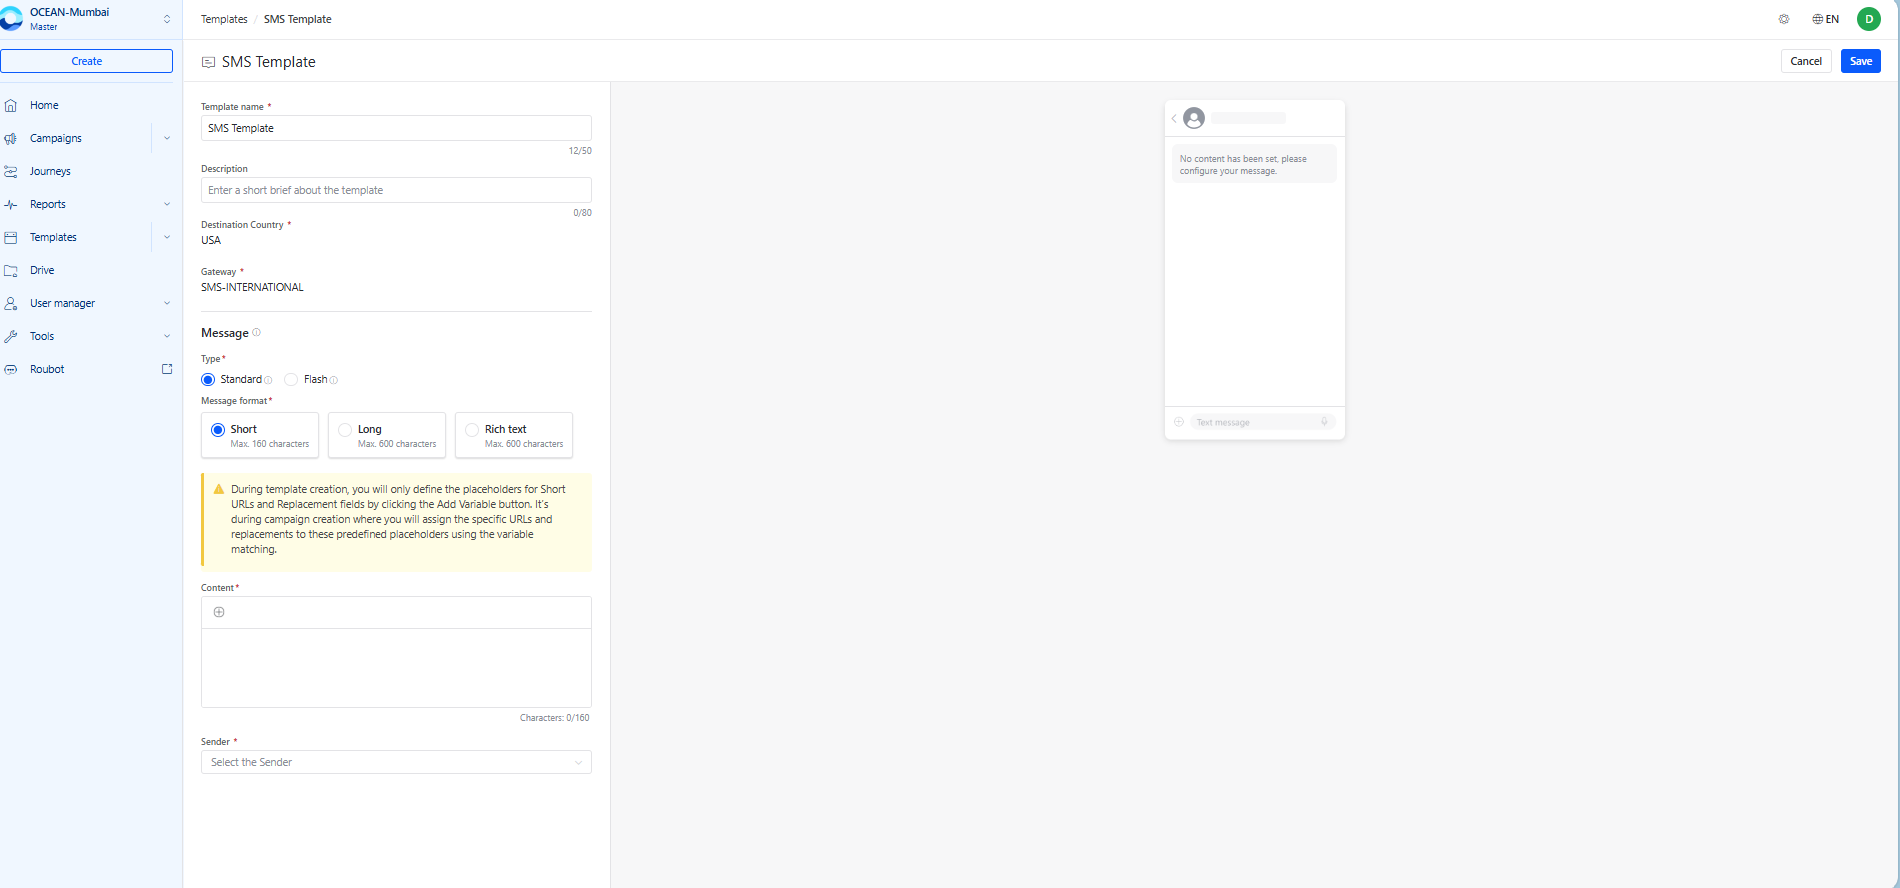
For a specific template country, Ocean displays the country-specific template view.
To configure a country-specific SMS template:
- Select the message type and format.
- Add the message in the content box.
- Click the + button to add variables in the message body.
- Add the sender available for the selected gateway.
- Click Save to save the template in the template manager.
Use operator-approved content for country-specific templates. Non-approved content can cause the sender to be blacklisted by the operator after campaign delivery.
The template is saved with the selected sender and is used to send campaigns with that sender.
WhatsApp templates
Use WhatsApp templates to create approved WhatsApp message content with categories, languages, headers, body text, footer text, and buttons.
Create a WhatsApp template
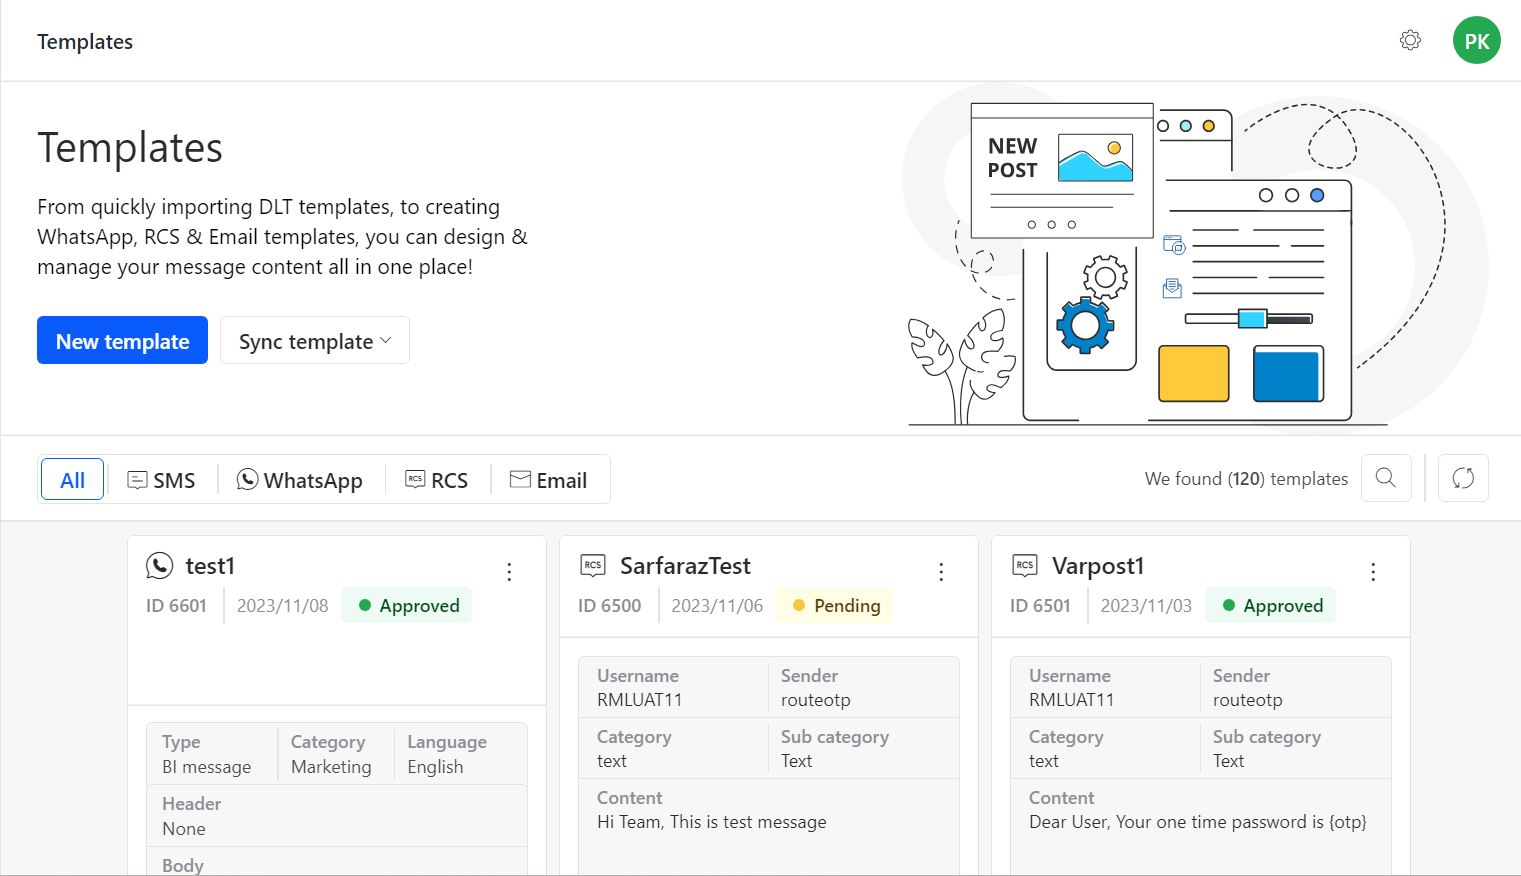
To create a WhatsApp template:
- Click Templates from the left panel.
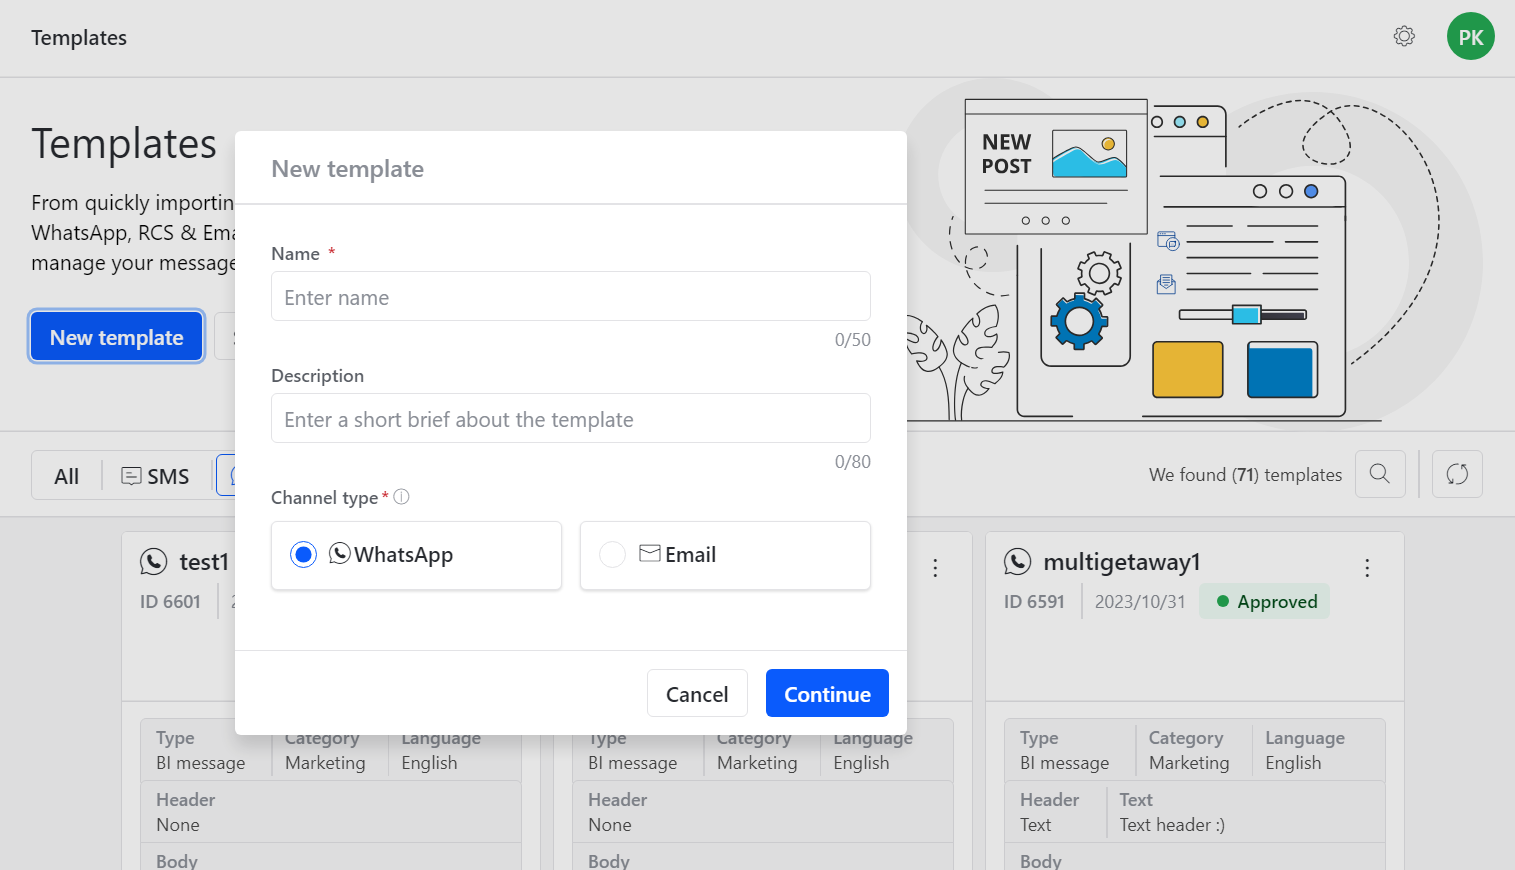
- Click New Template from the right side.
- Enter the Template name.
- Optionally, enter a short template description.
- Choose WhatsApp under Channel type.
- Click Continue to open the next page.
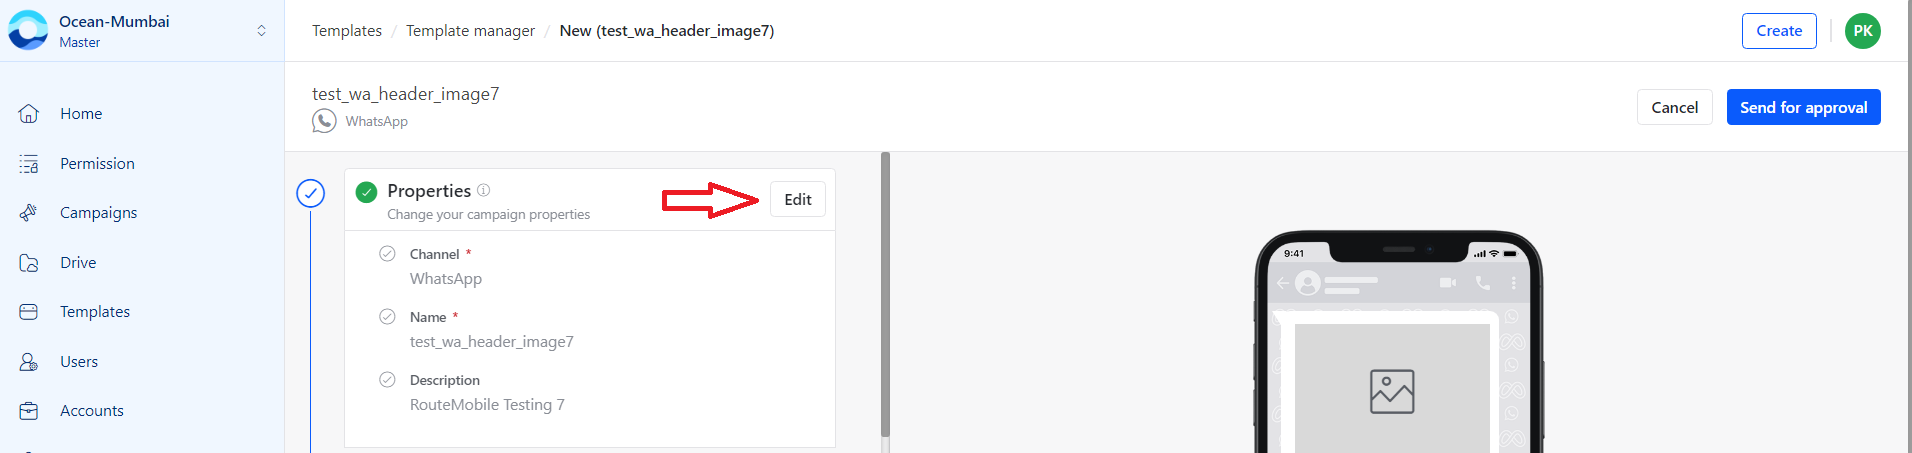
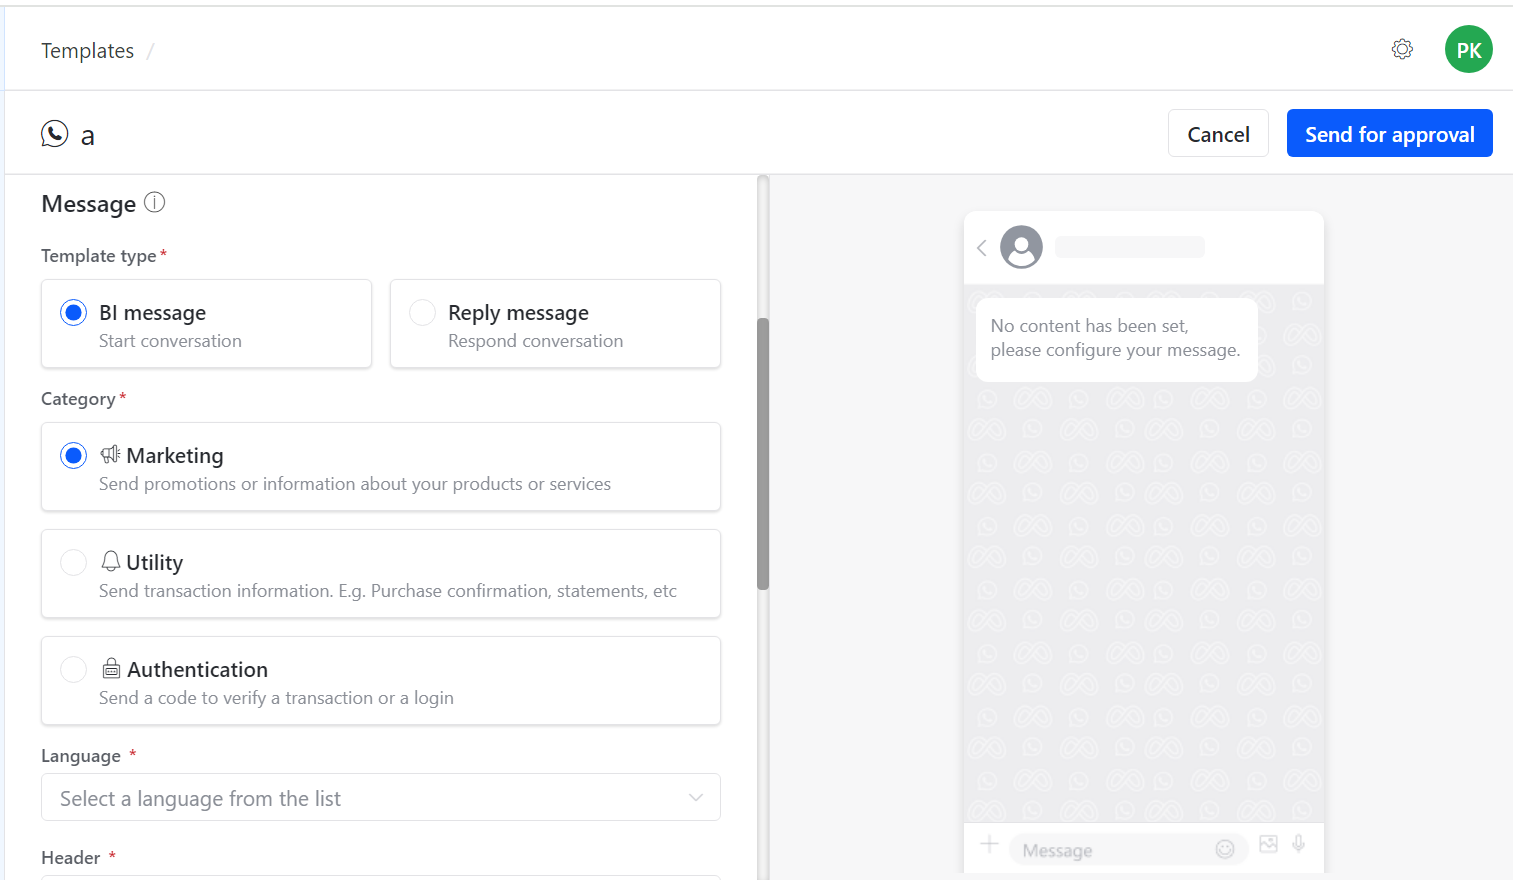
- Verify and edit the Properties section.
Configure WhatsApp template type, category, language, and header
Configure the basic WhatsApp template settings before adding message content.
| Setting | Options or description |
|---|---|
| Template type | Choose the template type, such as BI Message or Reply Message. |
| Category | Select one category: Marketing, Utility, or Authentication. |
| Language | Choose the preferred template language. |
| Header type | Choose Text, Image, Video, or Document. |
| Media file | If you choose a media header, upload the corresponding file in the media file option. |
Configure WhatsApp body, footer, and buttons
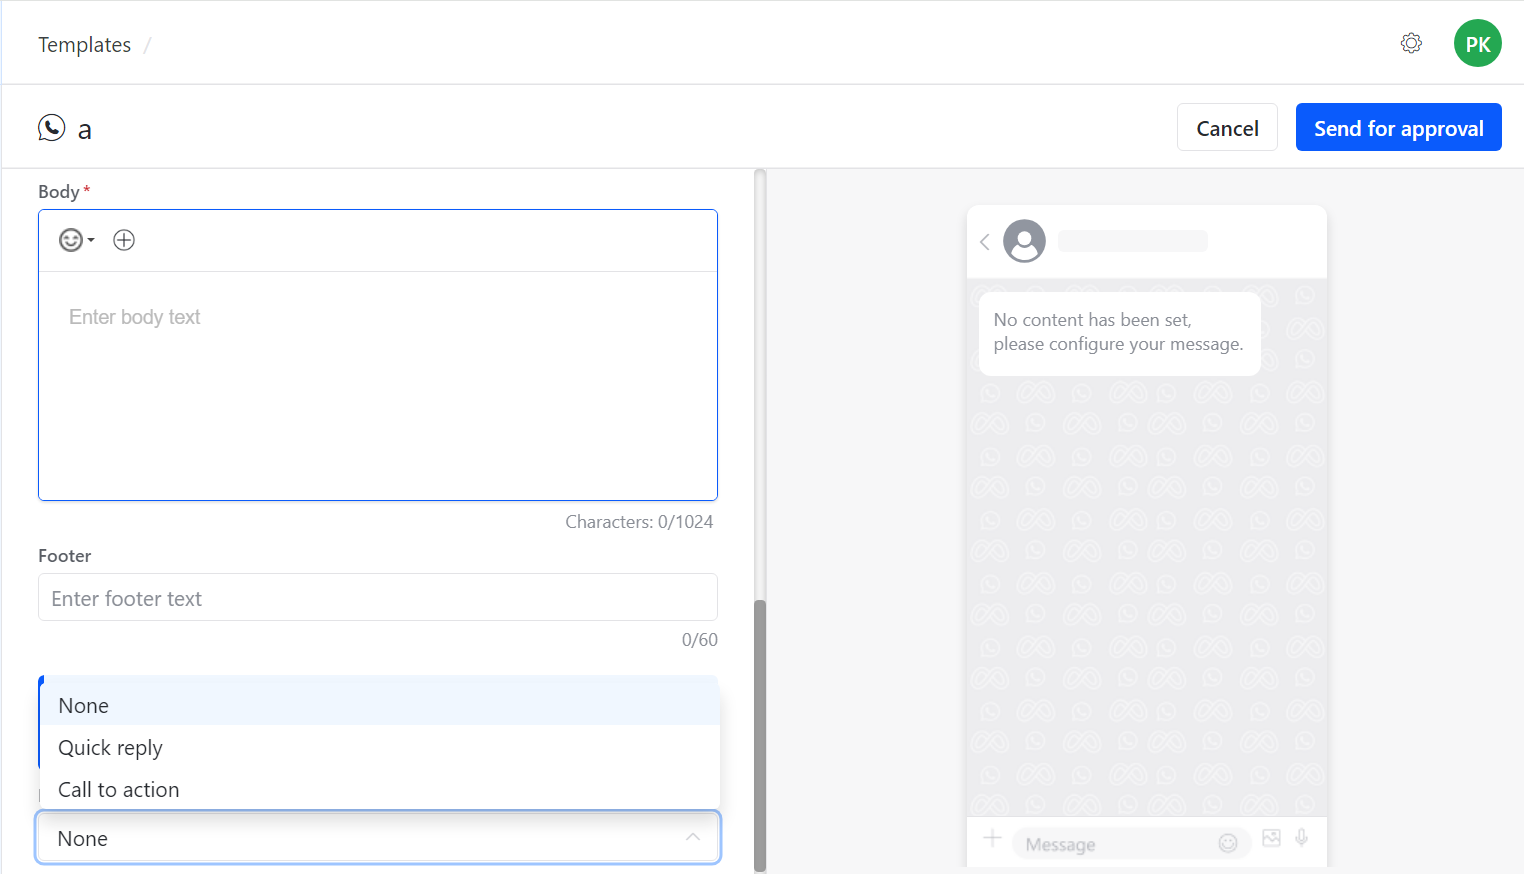
Add the message body, optional footer, and buttons.
| Section | Description |
|---|---|
| Text Body | Enter the message body. You can also add emojis. |
| Footer | Add footer text in the footer field. |
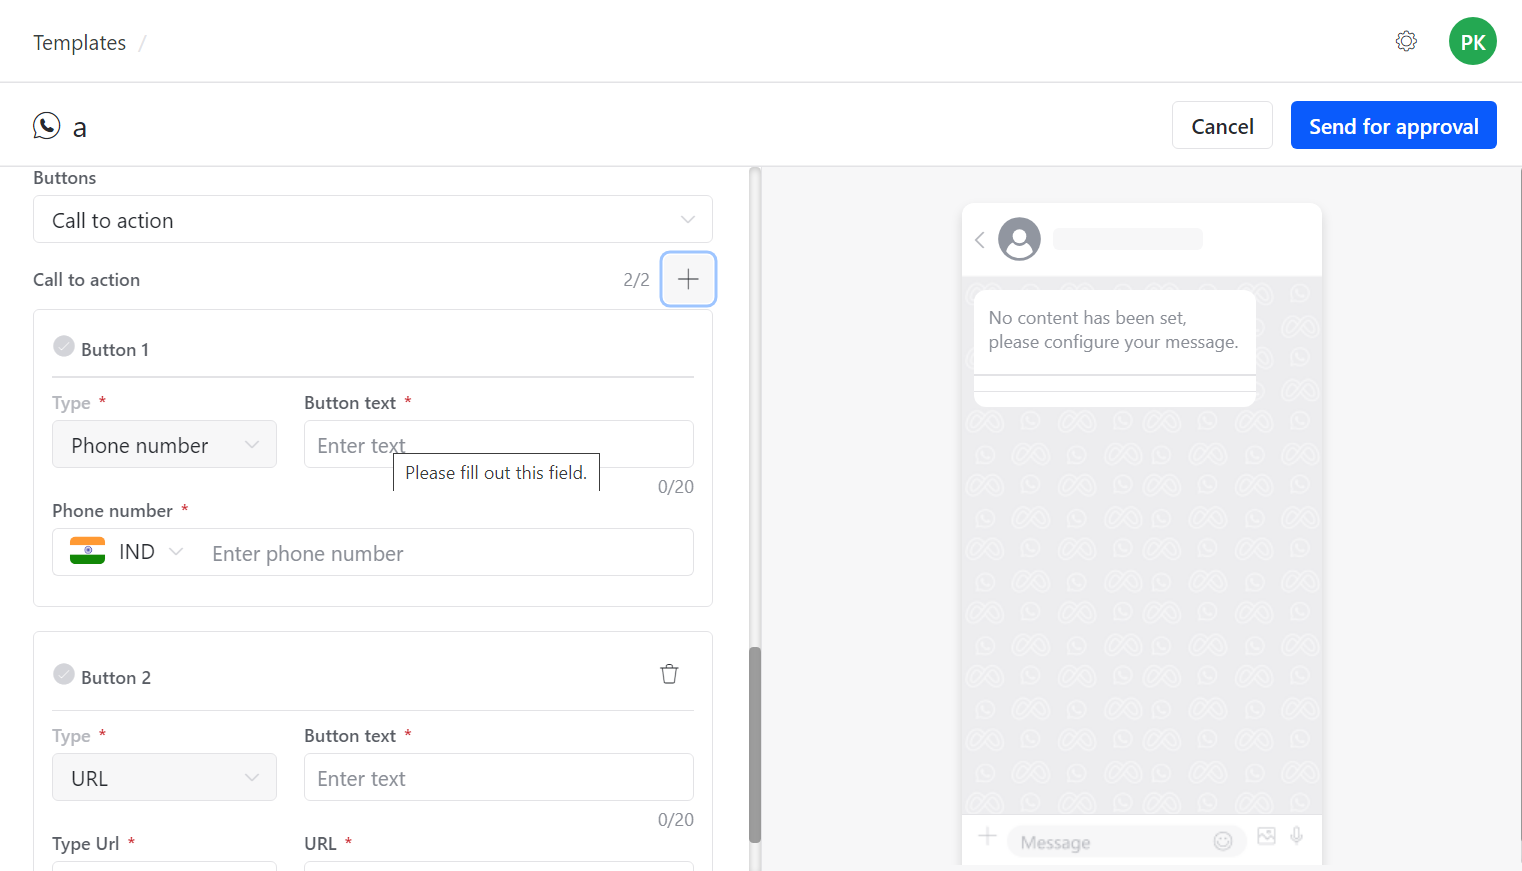
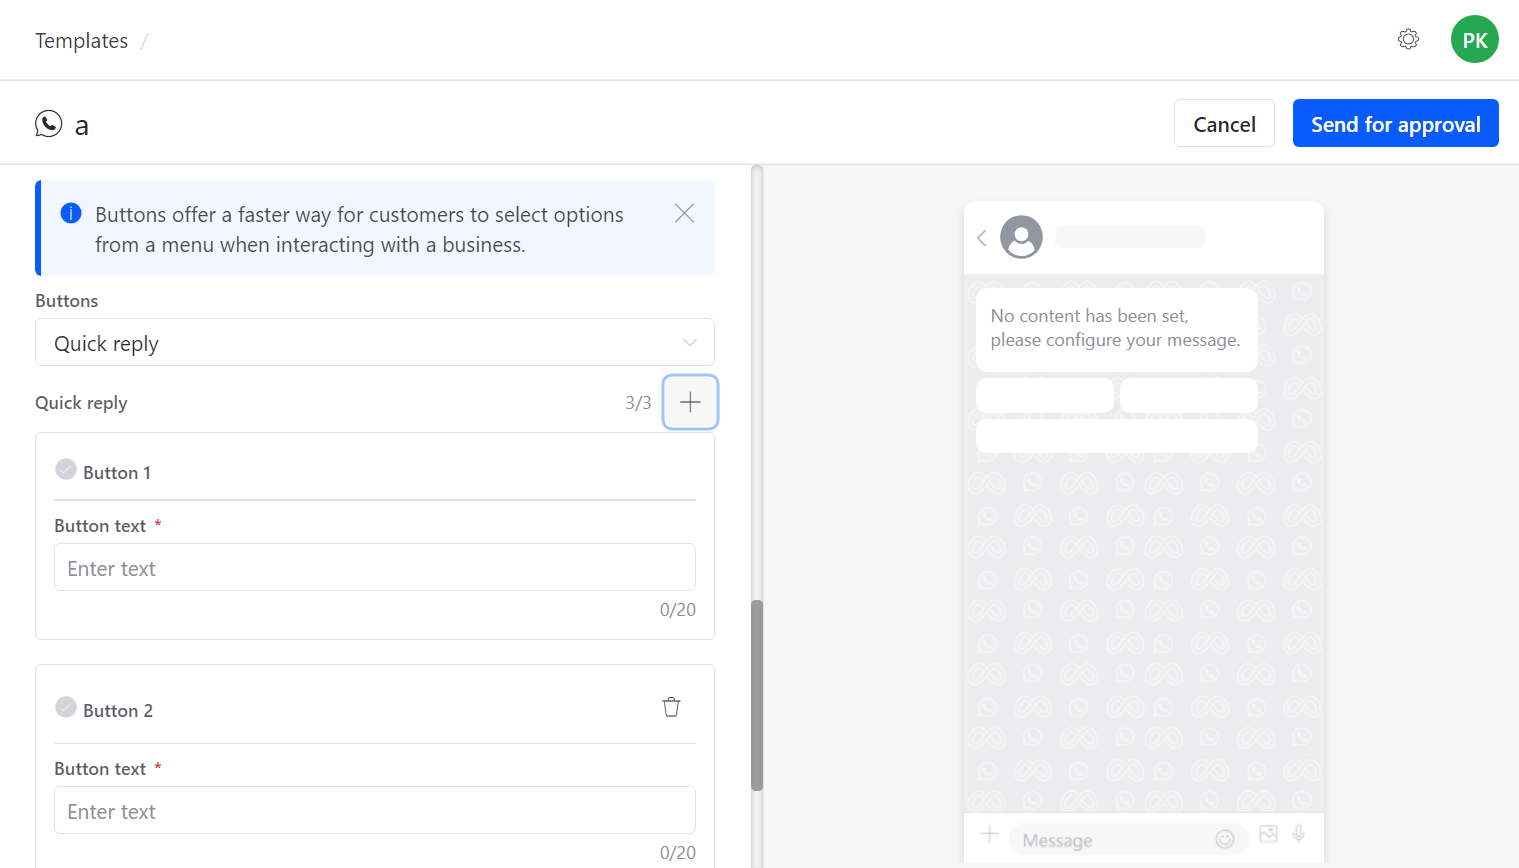
| Buttons | Choose Call to action buttons or Quick reply buttons. |
Configure WhatsApp buttons
WhatsApp templates support call-to-action and quick-reply buttons.
For Call to Action buttons:
- Choose the component type.
- Enter the button text.
- Enter the value for the selected component.
For Quick reply buttons:
- Enter the button text.
- Enter the response field.
Submit a WhatsApp template
After configuring the template, submit it for approval.
To submit a WhatsApp template:
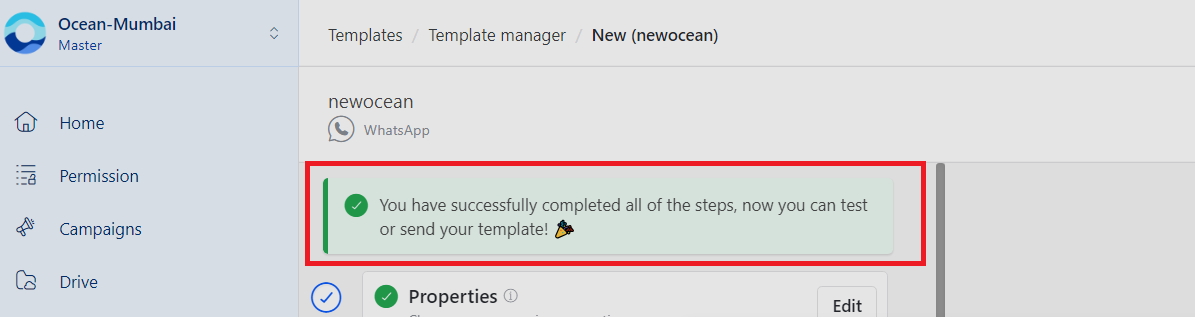
- Review the confirmation message that says the template is ready to be created.
- Click Send for approval from the top-right corner.
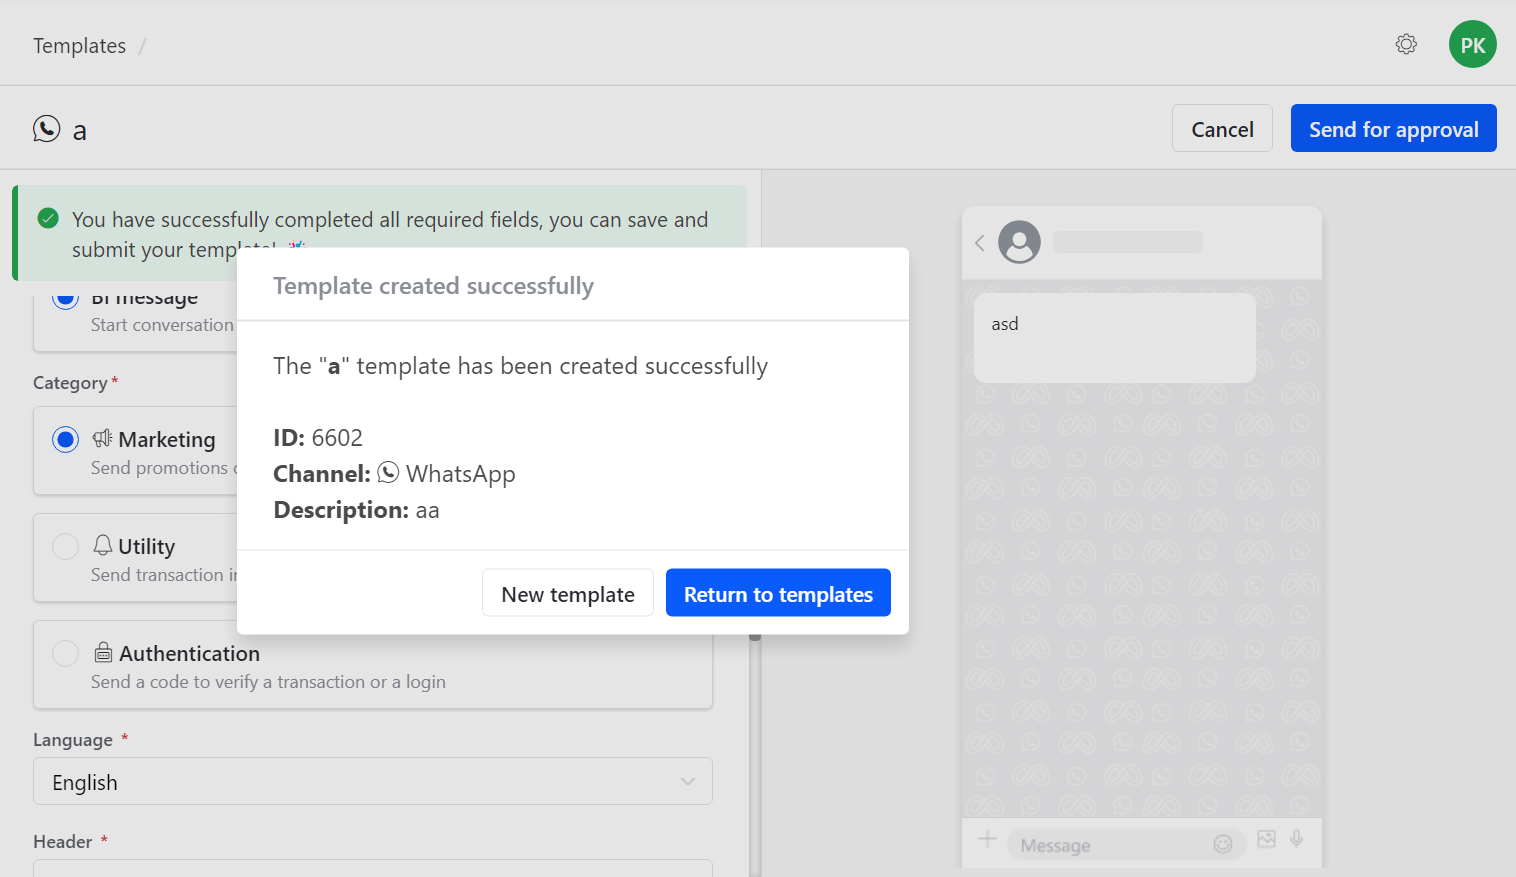
- Wait for the confirmation popup.
After submission, the template is created and sent for approval. The confirmation popup displays the template ID.
RCS templates
Use RCS templates to create reusable RCS message content with text, rich card, or carousel layouts.
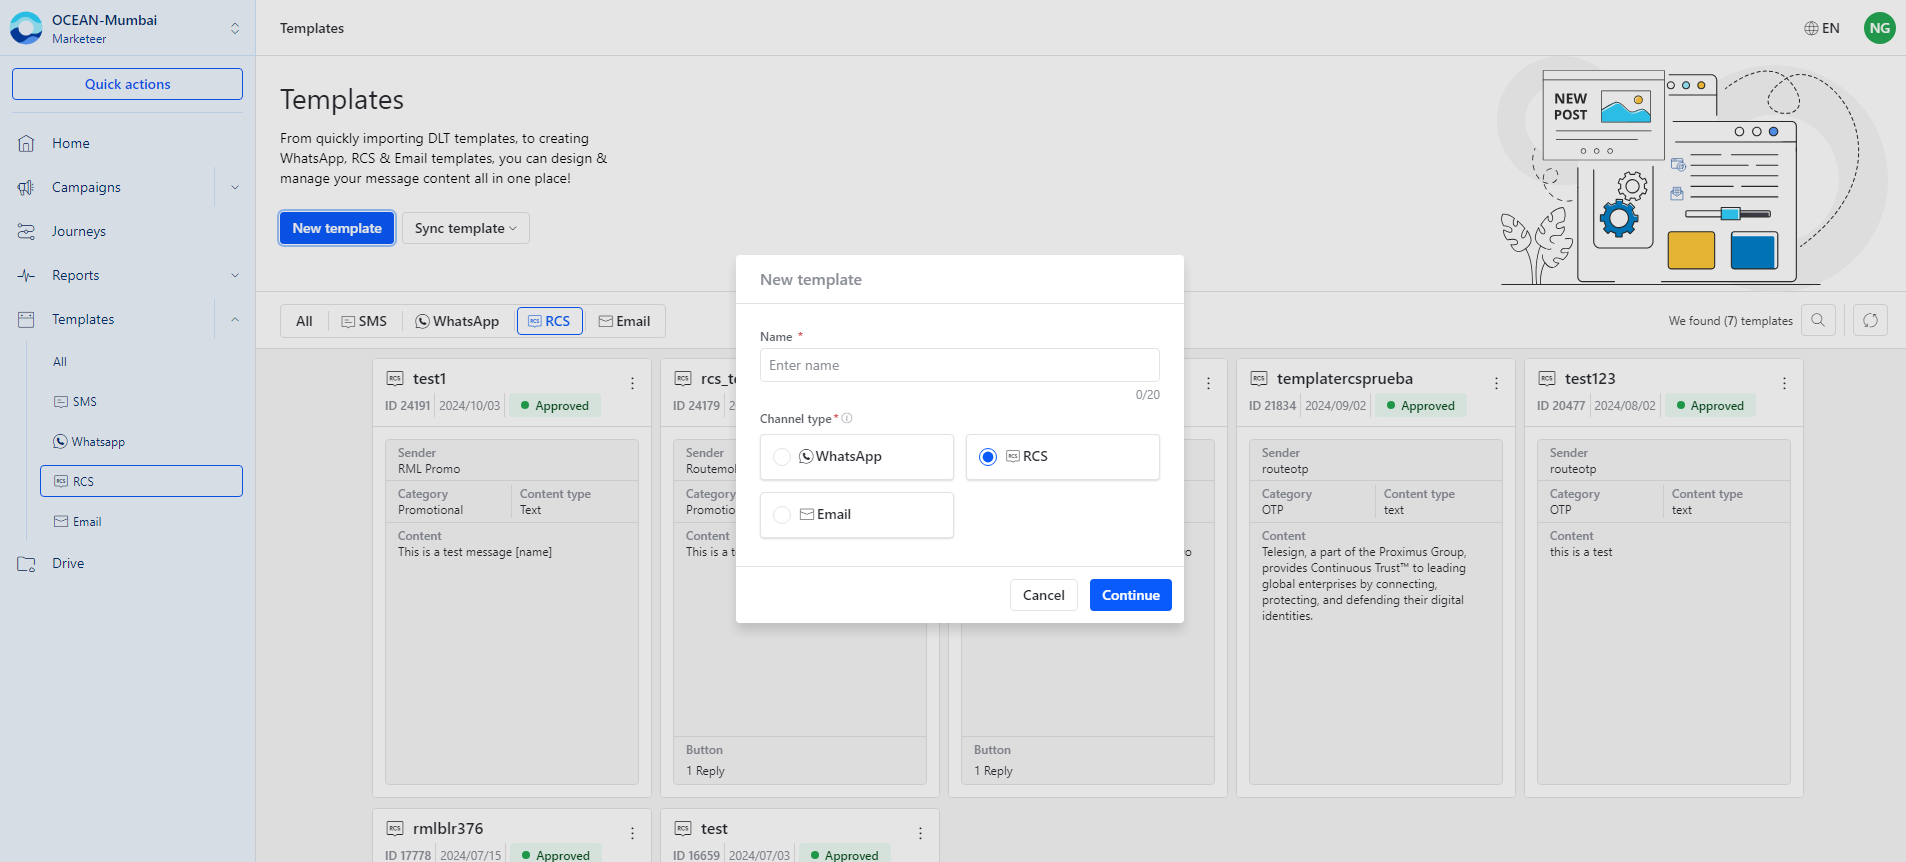
Create an RCS template
To create an RCS template:
- Click Templates from the left panel.
- Click New Template from the right side.
- Enter the Template name.
- Optionally, enter a short template description.
- Choose RCS under Channel type.
- Click Continue to open the next page.
Configure an RCS text template
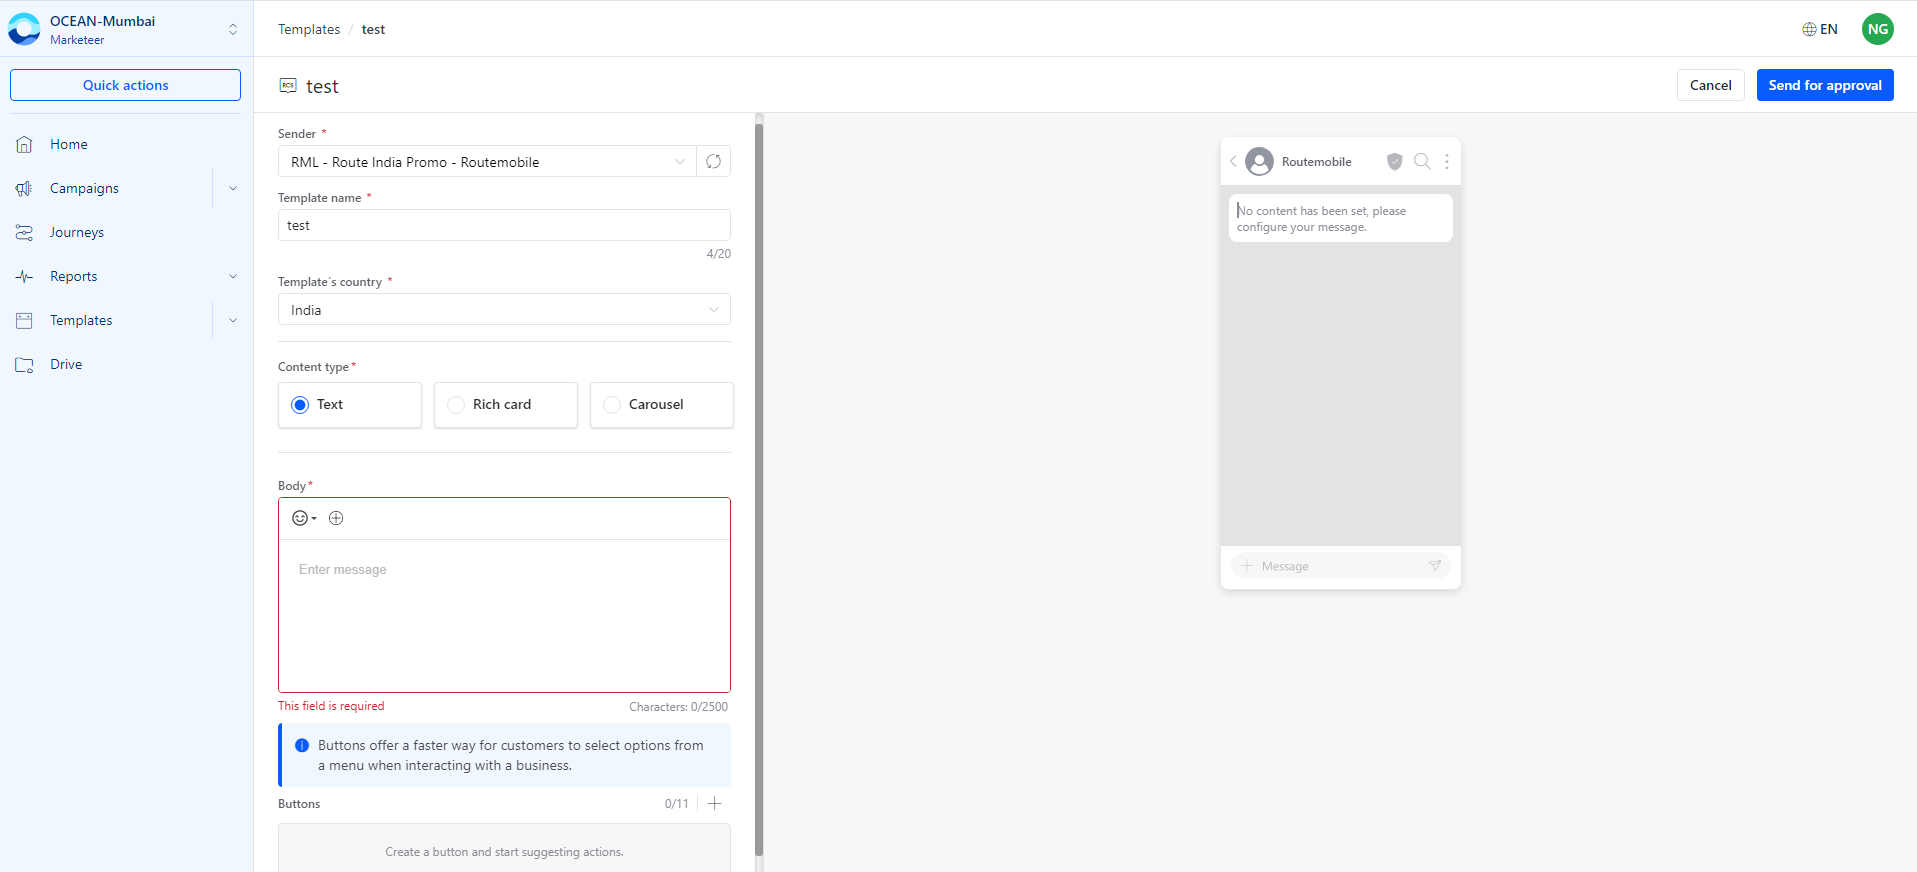
Fill in the required fields, such as Sender, Template Name, and Template Country.
For Content Type, select one of the following options:
- Text
- Rich card
- Carousel
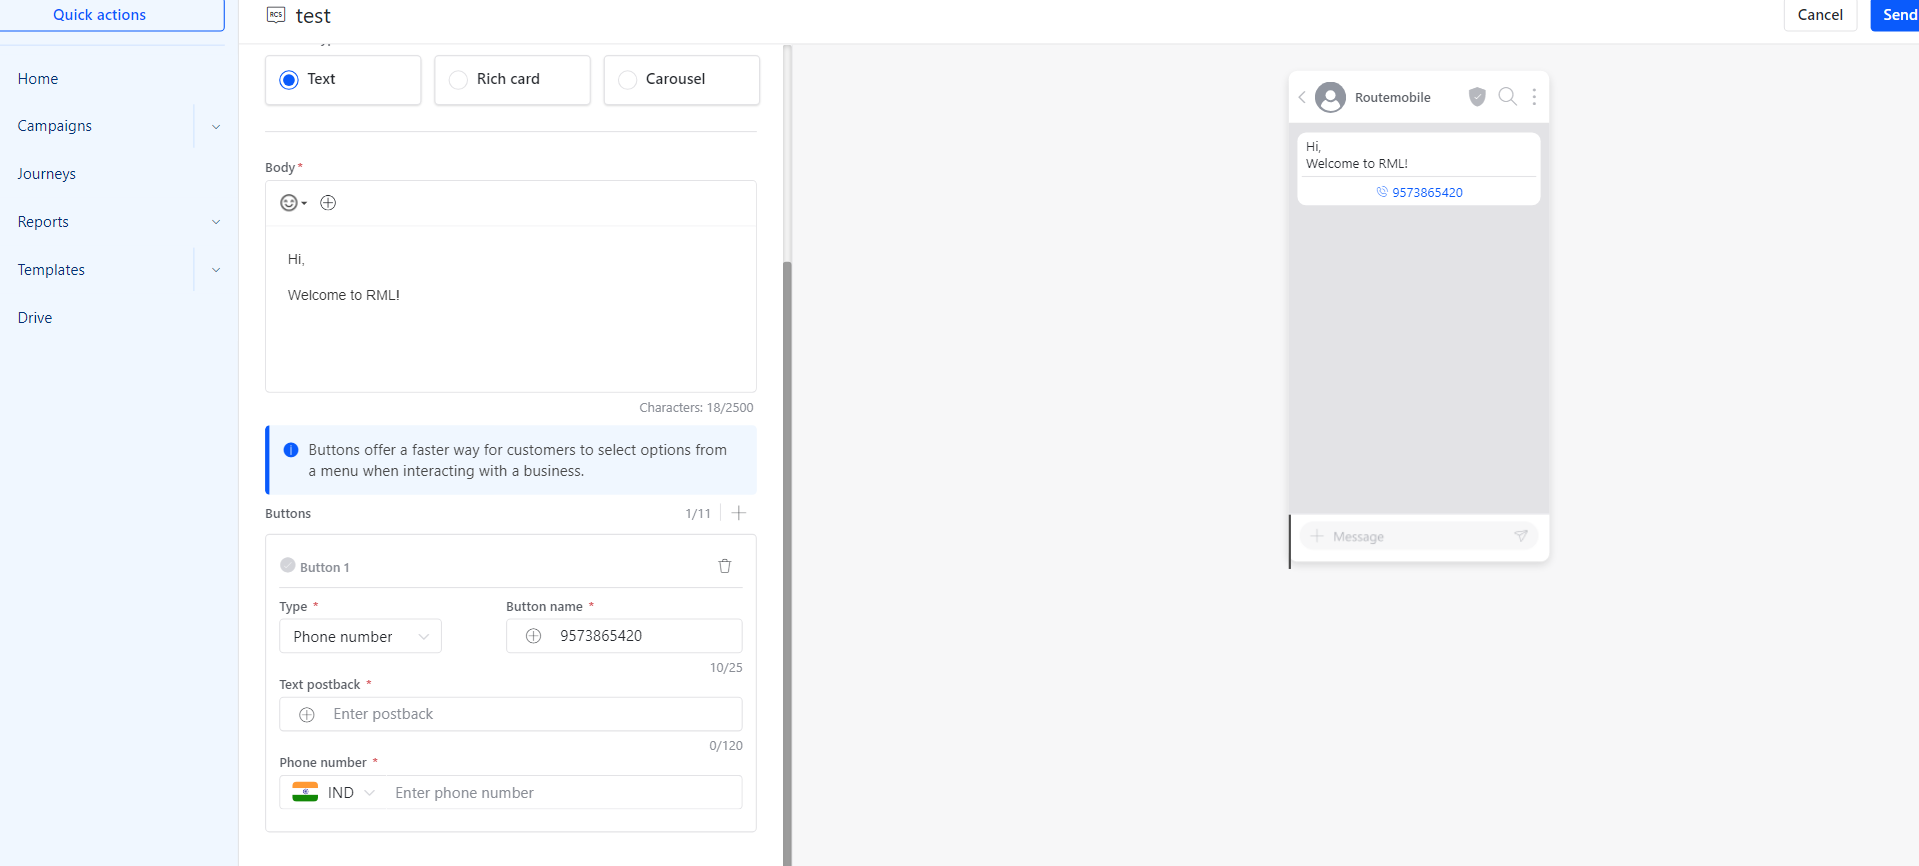
For a text template:
- Select Text as the content type.
- Enter the message content in the Body section.
- Review the preview to see how the message will appear.
- Add buttons, if required.
RCS templates support three button types:
- Reply
- Phone Number
- URL
Configure an RCS rich card template
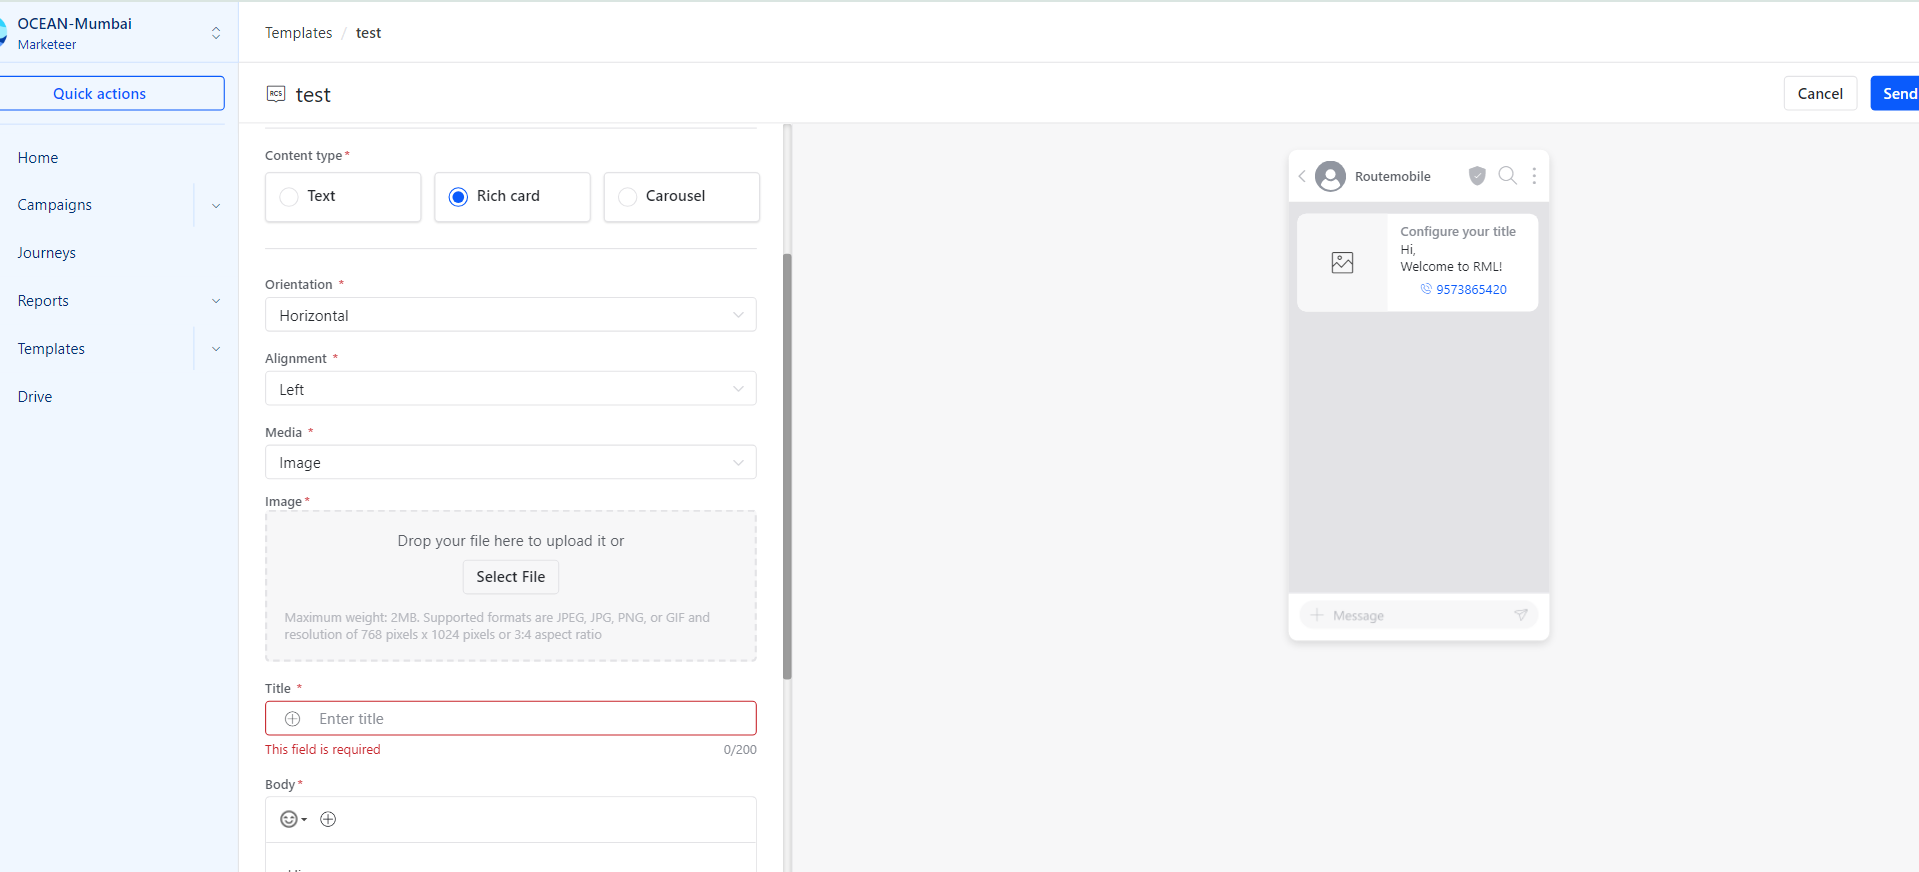
If you select Rich Card as the content type, configure the following components:
| Component | Description |
|---|---|
| Orientation | Determines whether the card layout is Horizontal or Vertical. |
| Alignment | Defines text alignment within the card, such as Left or other available alignment options. |
| Media Type | Selects the media type, such as Image or Video. Upload the selected media file. |
| Title | Displays prominently at the top of the rich card. |
Configure an RCS carousel template
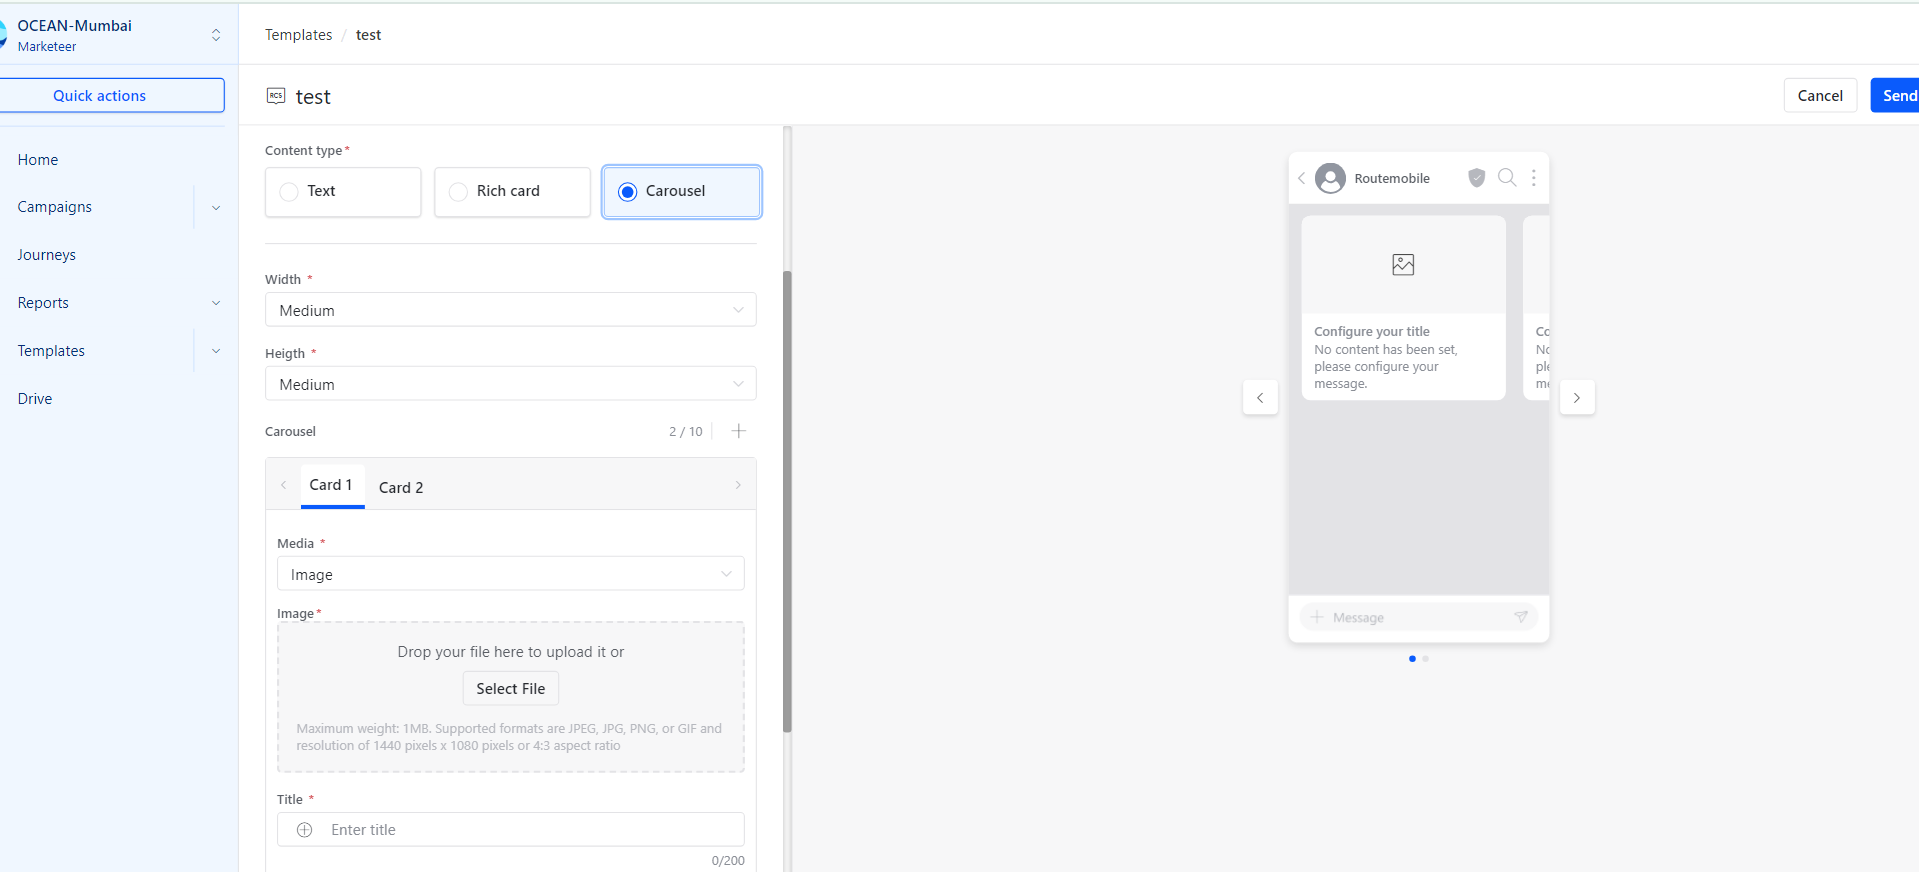
If you select Carousel as the content type, configure the carousel cards.
| Component | Description |
|---|---|
| Width and Height | Specifies the size of the carousel cards, with presets such as Medium or Small. |
| Carousel Cards | Each carousel can contain up to 10 cards. Each card can have unique content. |
| Media Type | Selects the media type, such as image or video, to display on the card. Upload the selected media file. |
| Title | Displays prominently at the top of the card. |
Submit an RCS template
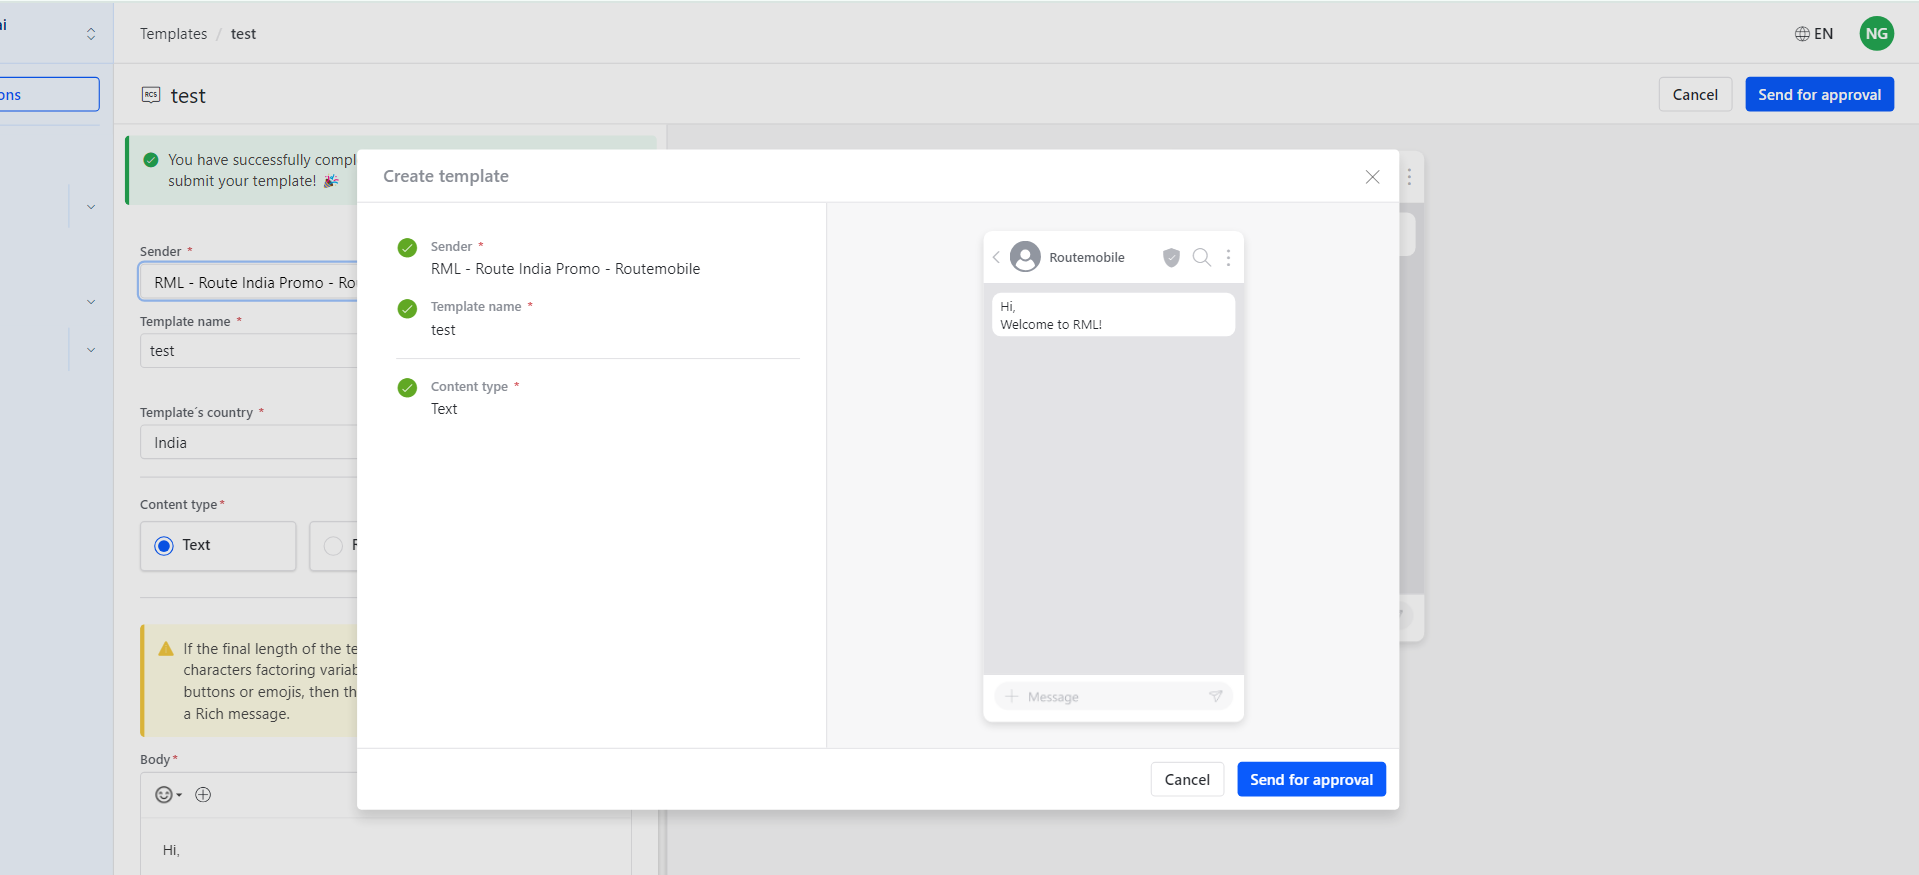
After configuring the template, use the top-right action buttons.
| Button | Description |
|---|---|
| Cancel | Discards the changes. |
| Send for approval | Submits the template for review and approval. |
After submission, the template is created and sent for approval. The confirmation popup displays the template ID.
Email templates
Use Email templates to create reusable email layouts with content structures, nodes, and attachments.
Create an Email template
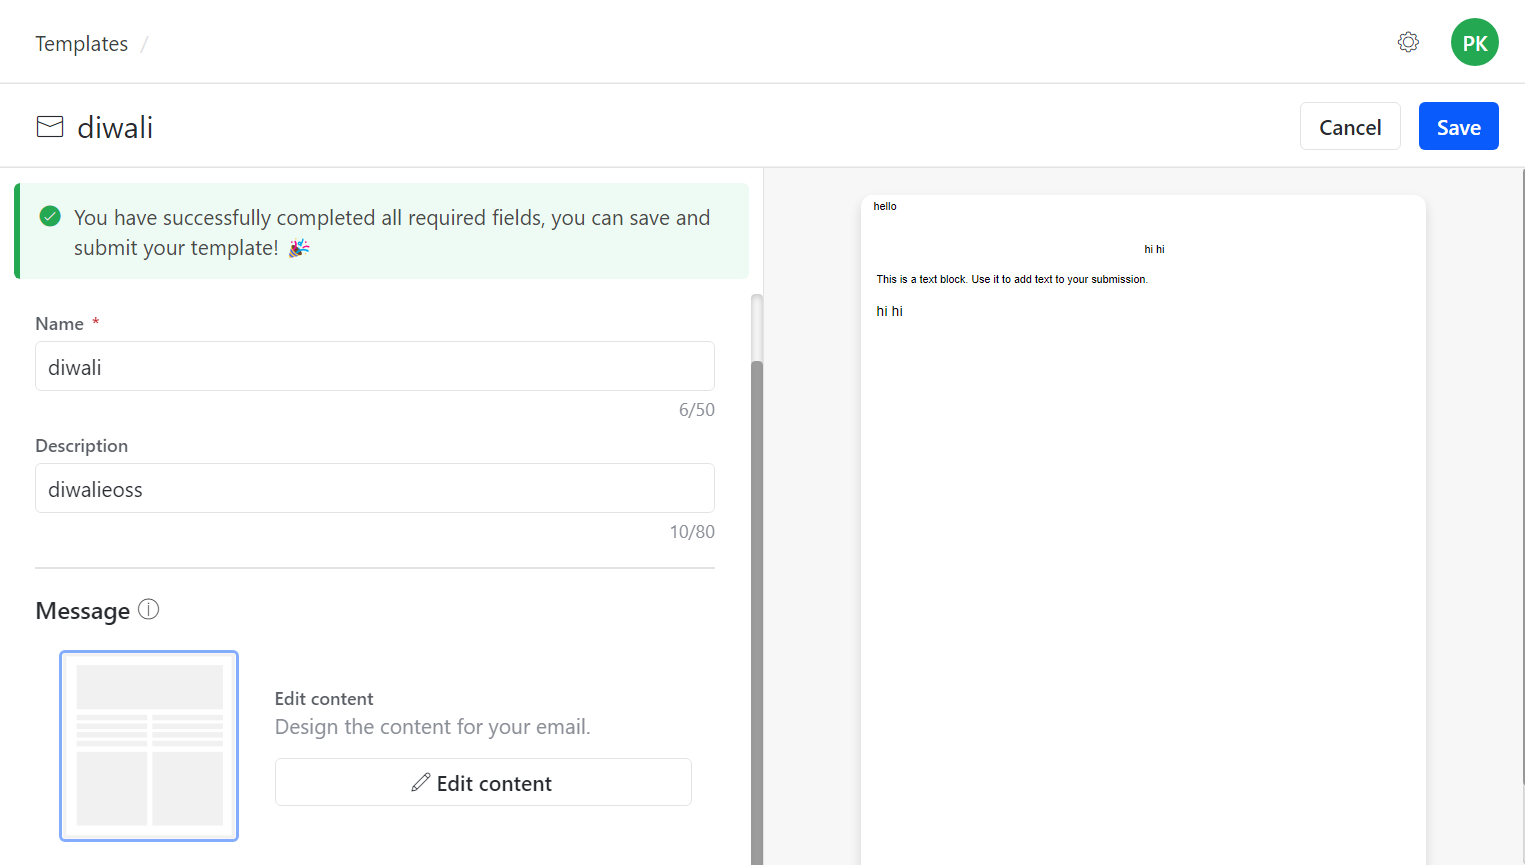
To create an Email template:
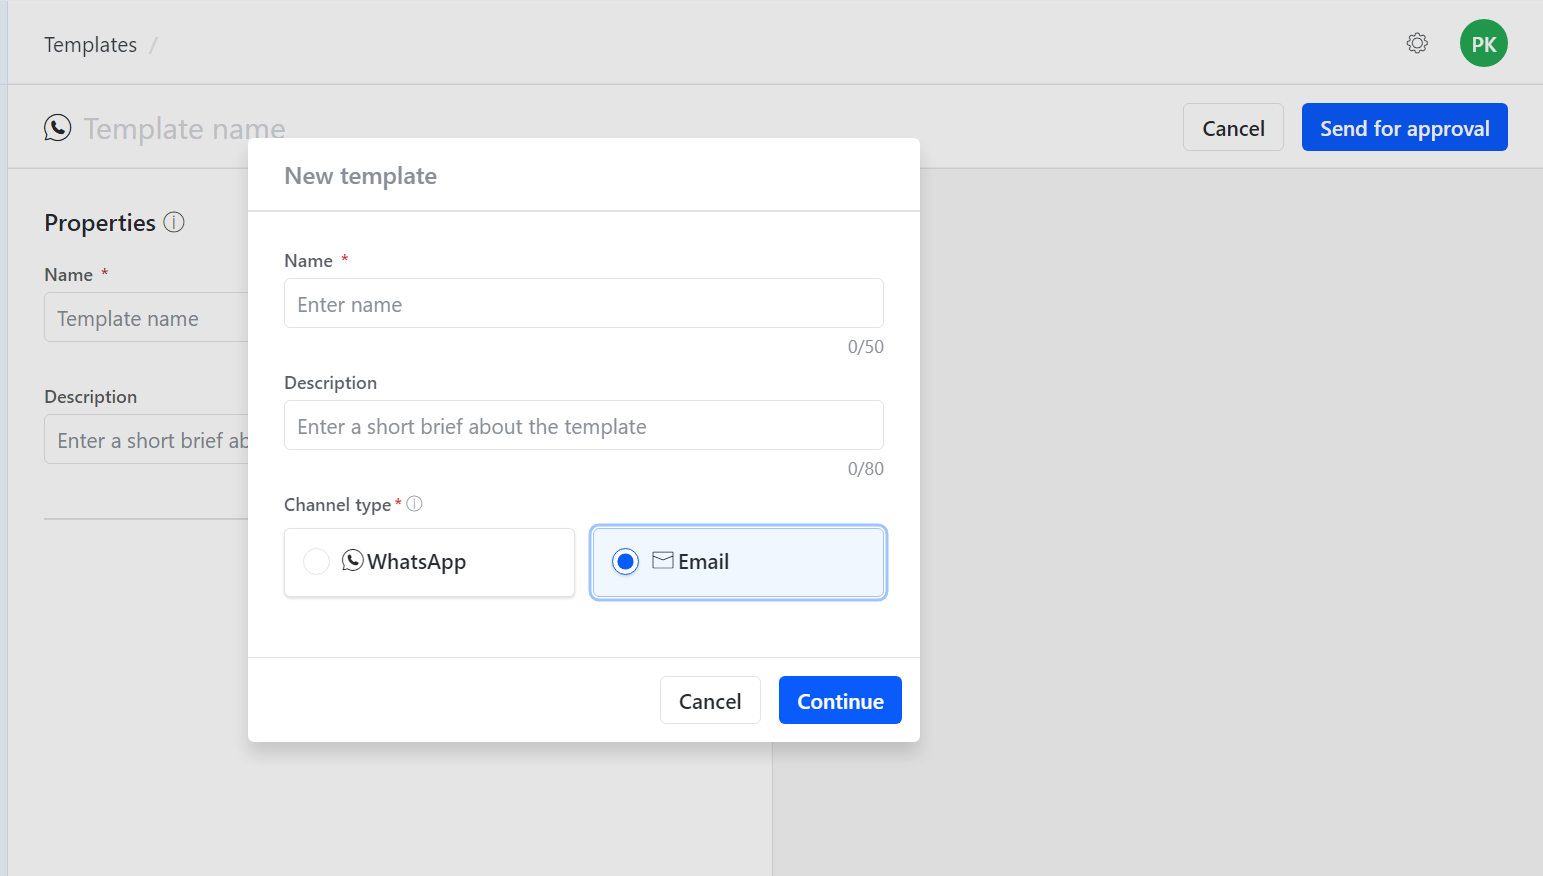
- Click Templates from the left panel.
- Click New Campaign from the right side.
- Enter the Template name.
- Optionally, enter a short template description.
- Choose Email under Channel type.
- Click Continue to open the next page.
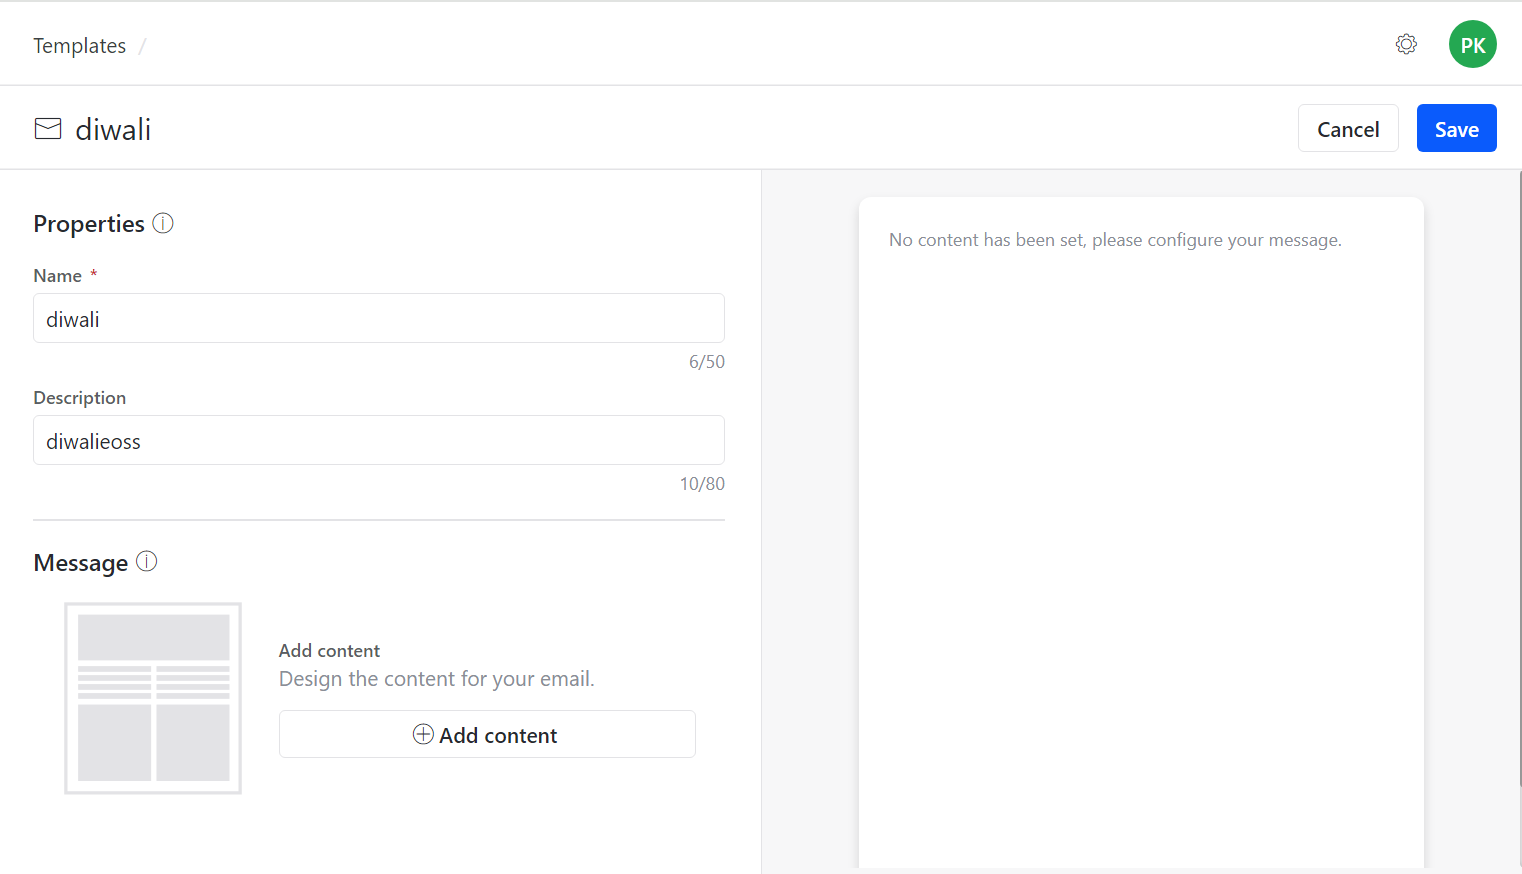
- Verify the Properties section.
Configure Email content and design
To configure the email message:
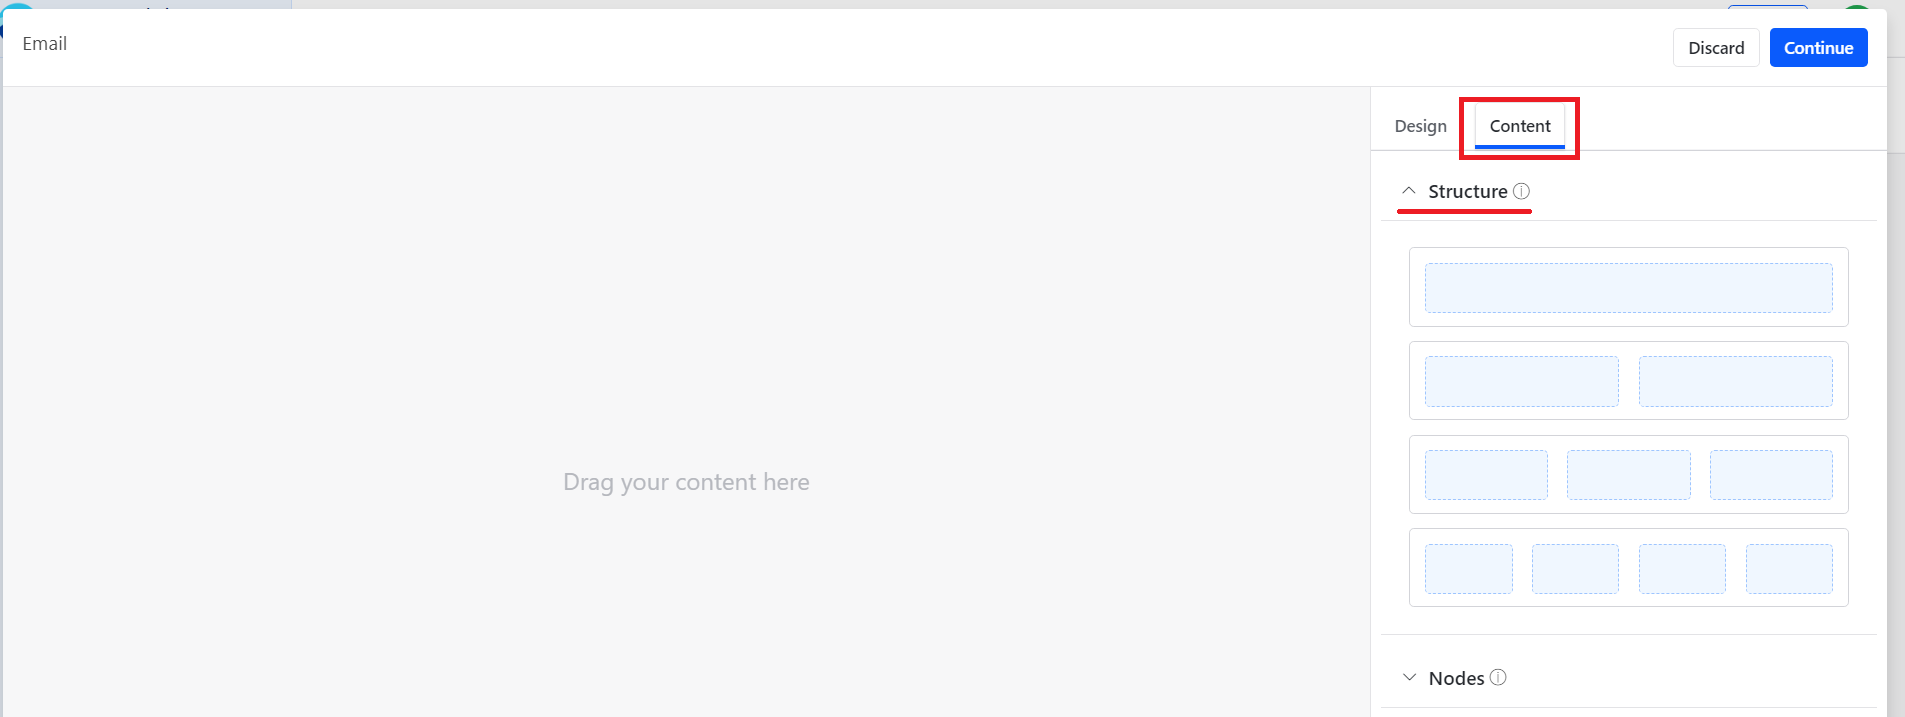
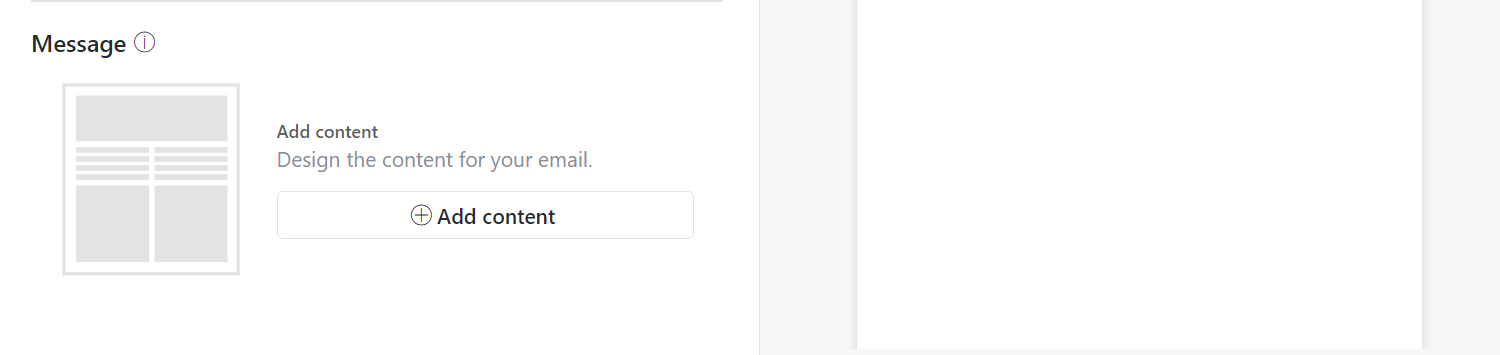
- Click Add content under Message.
- Click the Structure tab.
- Drag components from the structure panel to build the content layout on the left-side screen.
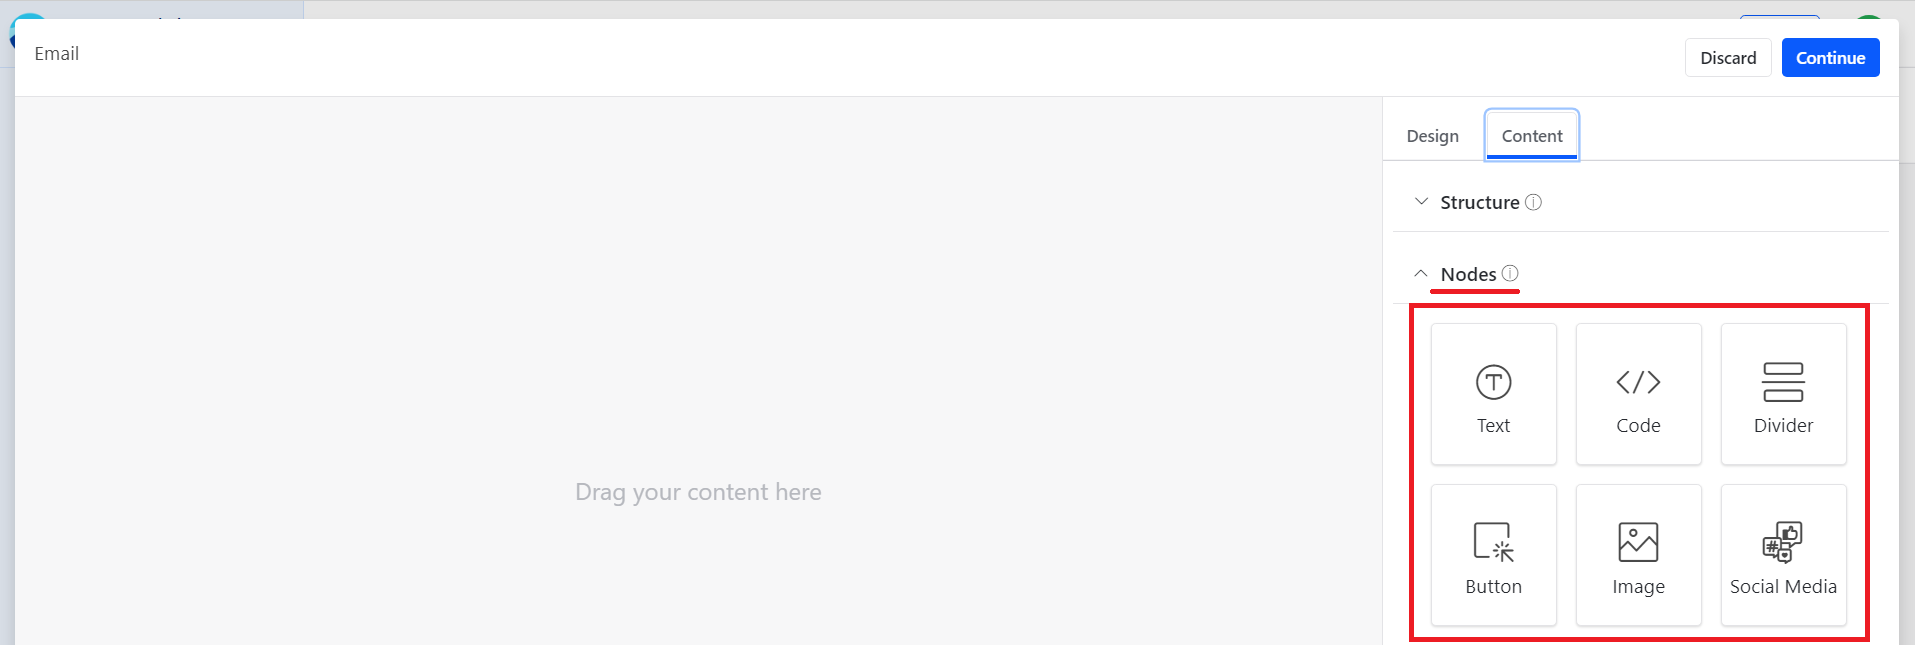
- Use nodes to add content to the template.
- Drag the required nodes to the left panel and customise them.
Available nodes include:
- Text
- Code
- Divider
- Button
- Image
- Social Media
Submit an Email template
After configuring the template:
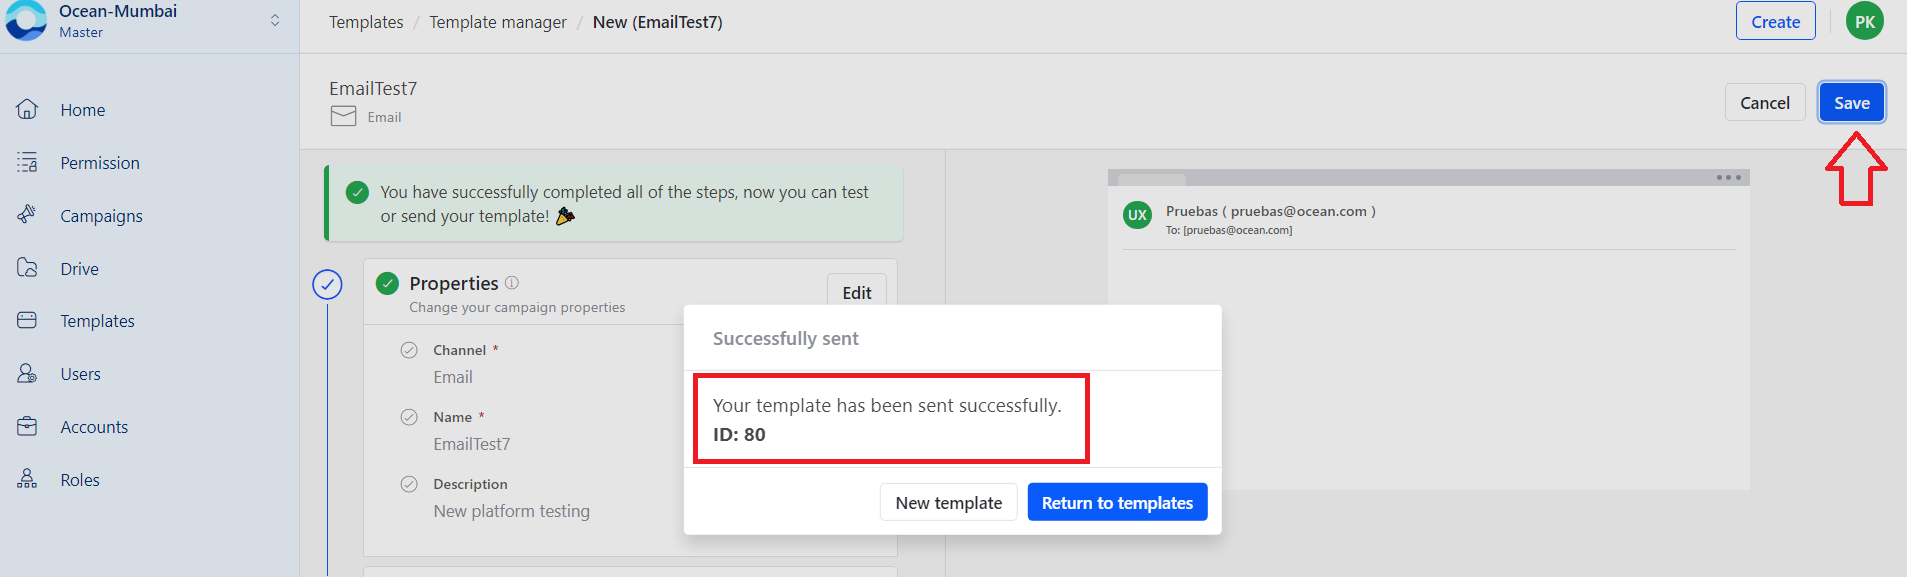
- Review the confirmation message that says the template is ready to be created.
- Click Save from the top-right corner.
- Wait for the confirmation popup.
After submission, the template is created and sent for approval. The confirmation popup displays the template ID.
Updated 4 days ago