
Customer Information
Customer Information Header
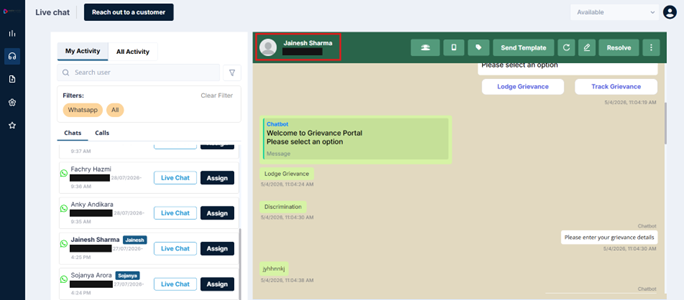
On the left side of the header, you'll see:
- Customer avatar — A circular icon representing the customer
- Customer name — The name as registered in the system
- Phone number — The customer's contact number, displayed directly below the name
- Department or product label — If this conversation is associated with a specific product or department, that label appears here alongside the name. This information is also synced from the integrated CRM, where applicable.
Viewing Customer Details
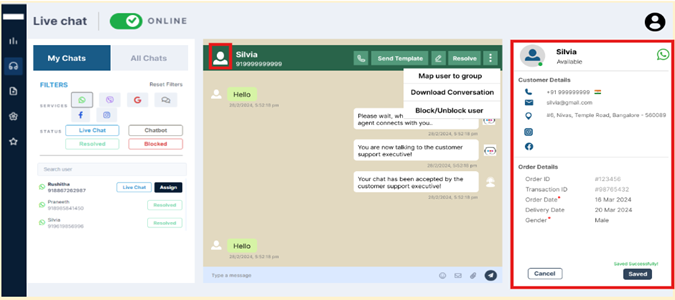
Clicking on the customer's name at the top of the conversation opens a detailed information panel on the right-hand side of your screen.
This panel displays customer information that has been pulled in through your organization's system — the fields you see here depend entirely on how your enterprise has configured the integration. For example:
- E-commerce setup might show order IDs, transaction history, and delivery dates
- Ed-tech platform might display course enrollments, batch details, or payment status
- Healthcare setup might show appointment details, patient ID, or consultation history
The fields are configured at the chat-flow level by your administrator and connected to your organization's CRM or backend system.
The information displayed here is specific to your organization's setup — no two implementations look exactly the same.
Filling In Details During a Conversation
In some cases, you may also see editable fields within this panel — such as order details or additional information fields. These are fields your organization has enabled for agents to fill in during a conversation.
Any information you enter here is mapped directly back to your organization's CRM — so what you fill in becomes part of the customer's record on your end.
Updated 3 months ago